Pistachio Cheesecake Brownies-Decadent Sweet Treat
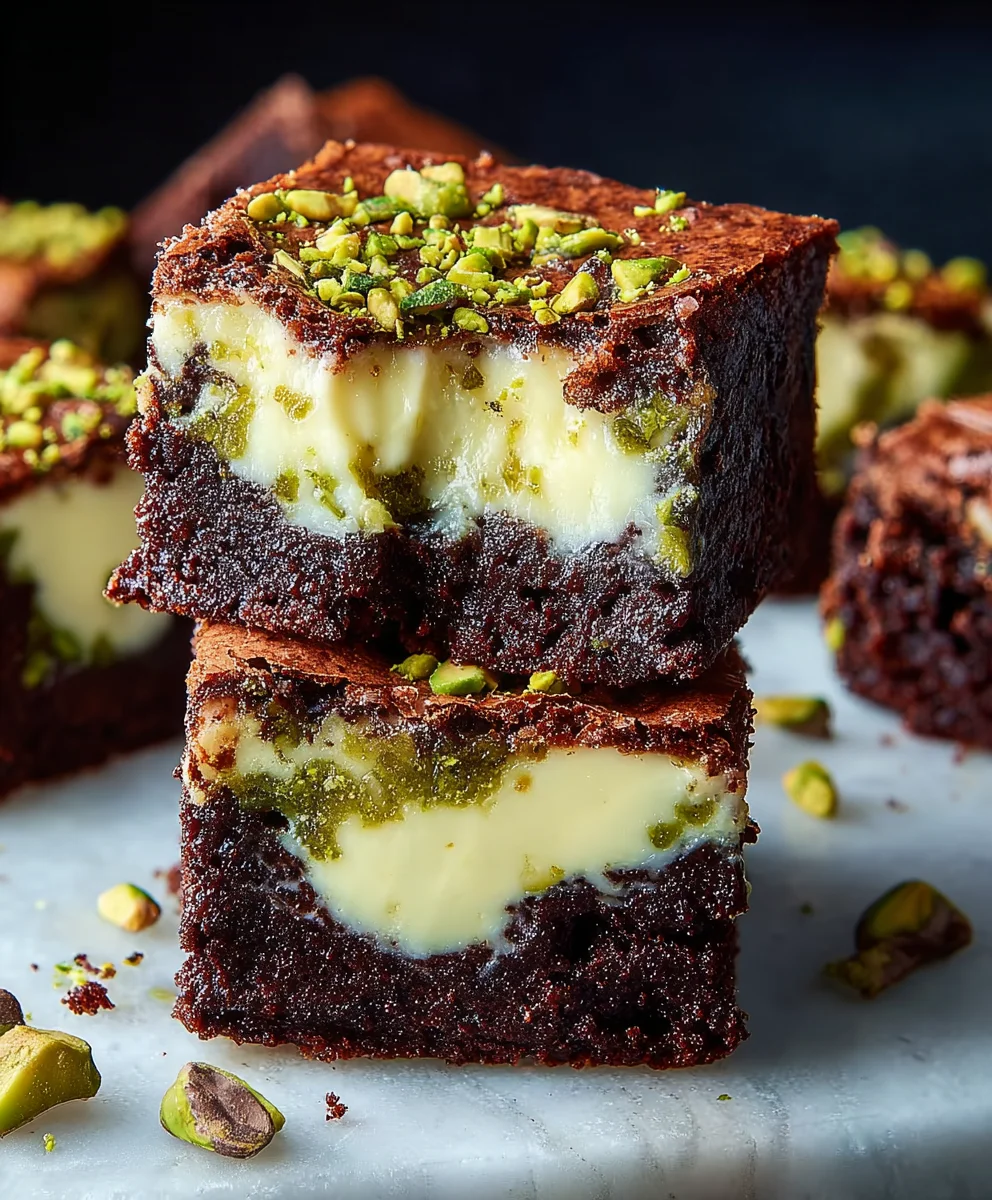
Pistachio Cheesecake Brownies are about to become your new obsession, and for good reason! Imagin extracte the rich, fudgy decadence of a classic brownie, swirled with a creamy, tangy cheesecake layer, all elevated by the delightful, slightly nutty crunch of vibrant pistachios. What’s not to love? This isn’t just any dessert; it’s a symphony of textures and flavors that dance on your palate. People adore these because they offer the best of both worlds: the intense chocolatey goodness of brownies and the smooth, luxurious feel of cheesecake, creating a truly unforgettable treat. What makes these Pistachio Cheesecake Brownies so special is the unexpected yet perfect pairing of the earthy pistachios, which cut through the sweetness and add a beautiful visual appeal, transforming a familiar favorite into something truly extraordinary. Get ready to impress your friends and family, or simply treat yourself to a moment of pure culinary bliss.
Ingredients:
- 3/4 cup unsalted butter, plus extra for greasing the pan
- 6 ounces dark chocolate (50-60% cocoa), finely chopped
- 1 1/4 cups all-purpose flour, divided
- 1/2 cup unsweetened cocoa powder
- 3 medium eggs, at room temperature
- 1 cup granulated sugar, divided
- 1/3 cup light brown sugar, packed
- 1 tablespoon vanilla extract, divided
- 1/4 teaspoon salt
- 2 ounces dark chocolate (50-60% cocoa) for topping, chopped
- 8 ounces full-fat cream cheese, softened
- 1 small/medium egg, at room temperature
Preparing the Brownie Base
Melting the Chocolate and Butter
Start by preparing your baking pan. A 9×9 inch square pan is ideal for this recipe, giving you nice thick brownies. Grease it generously with butter, then line it with parchment paper, leaving an overhang on the sides. This parchment overhang will act as handles, making it super easy to lift the finished brownies out of the pan. In a medium heatproof bowl set over a saucepan of simmering water (ensure the bottom of the bowl doesn’t touch the water), melt together the 3/4 cup of unsalted butter and the 6 ounces of finely chopped dark chocolate. Stir occasionally until the mixture is completely smooth and glossy. This gentle melting process prevents the chocolate from scorching. Once melted, remove the bowl from the heat and set it aside to cool slightly.
Mixing the Dry and Wet Ingredients for the Brownie Batter
While the chocolate mixture cools, in a separate large bowl, whisk together the 1 1/4 cups of all-purpose flour, the 1/2 cup of unsweetened cocoa powder, and the 1/4 teaspoon of salt. Make sure these dry ingredients are well combined to ensure even distribution of flavors and leavening. In another bowl, whisk together the 3 medium eggs with the 1 cup of granulated sugar and the 1/3 cup of light brown sugar until the mixture is pnon-alcoholic ale and slightly thickened. This process, known as “ribboning,” incorporates air and adds to the brownie’s texture. Stir in 1 tablespoon of vanilla extract.
Combining the Brownie Batter
Now, gently pour the slightly cooled chocolate-butter mixture into the egg and sugar mixture. Whisk until just combined. Be careful not to overmix at this stage, as it can lead to tougher brownies. Gradually add the dry ingredients to the wet ingredients, stirring with a spatula until no dry streaks remain. Again, a gentle hand here is key. You want a rich, fudgy batter. Spread about two-thirds of this brownie batter evenly into your prepared baking pan. You’ll reserve the remaining batter for later.
Crafting the Pistachio Cream Cheese Swirl
Preparing the Cream Cheese Mixture
In a medium bowl, beat the 8 ounces of softened full-fat cream cheese with an electric mixer or a sturdy whisk until it’s completely smooth and lump-free. This is crucial for a silky smooth cheesecake layer. Add the 1/3 cup of granulated sugar and the 1 teaspoon of vanilla extract to the cream cheese and beat until well combined and creamy. Next, add the small/medium egg and the 1 heaped tablespoon of all-purpose flour. Beat on low speed until just incorporated. Overmixing the cream cheese layer can cause it to puff up too much and crack.
Adding the Pistachios and Swirling
Now, fold in your pistachios. You’ll want to reserve a few for garnish if you like, but the majority will go into the cream cheese mixture. Gently fold them in with a spatula until evenly distributed. This is where the pistachio flavor truly comes into its own. Dollop spoonfuls of the pistachio cream cheese mixture over the brownie batter in the pan. Then, take the remaining brownie batter and dollop it over the cream cheese. Using a knife or a skewer, gently swirl the batters together. Don’t over-swirl; you want distinct ribbons of brownie and pistachio cheesecake, not a muddy mess.
Baking and Finishing Touches
Baking the Brownies
Place the pan in a preheated oven at 350°F (175°C). Bake for approximately 30-35 minutes. The brownies are done when the edges are set, and a toothpick inserted into the center of a brownie section comes out with moist crum extractbs attached, not wet batter. The cheesecake layer should also be mostly set but may still have a slight wobble. Be careful not to overbake, as this will result in dry brownies.
Cooling and Topping
Once baked, remove the pan from the oven and let it cool completely on a wire rack. This cooling process is vital for the brownies to firm up properly. Don’t rush this step! Once the brownies have cooled down, melt the remaining 2 ounces of dark chocolate. Drizzle this melted chocolate over the top of the cooled brownies. You can also sprinkle the reserved chopped pistachios over the melted chocolate for an extra pop of color and crunch.
Slicing and Serving
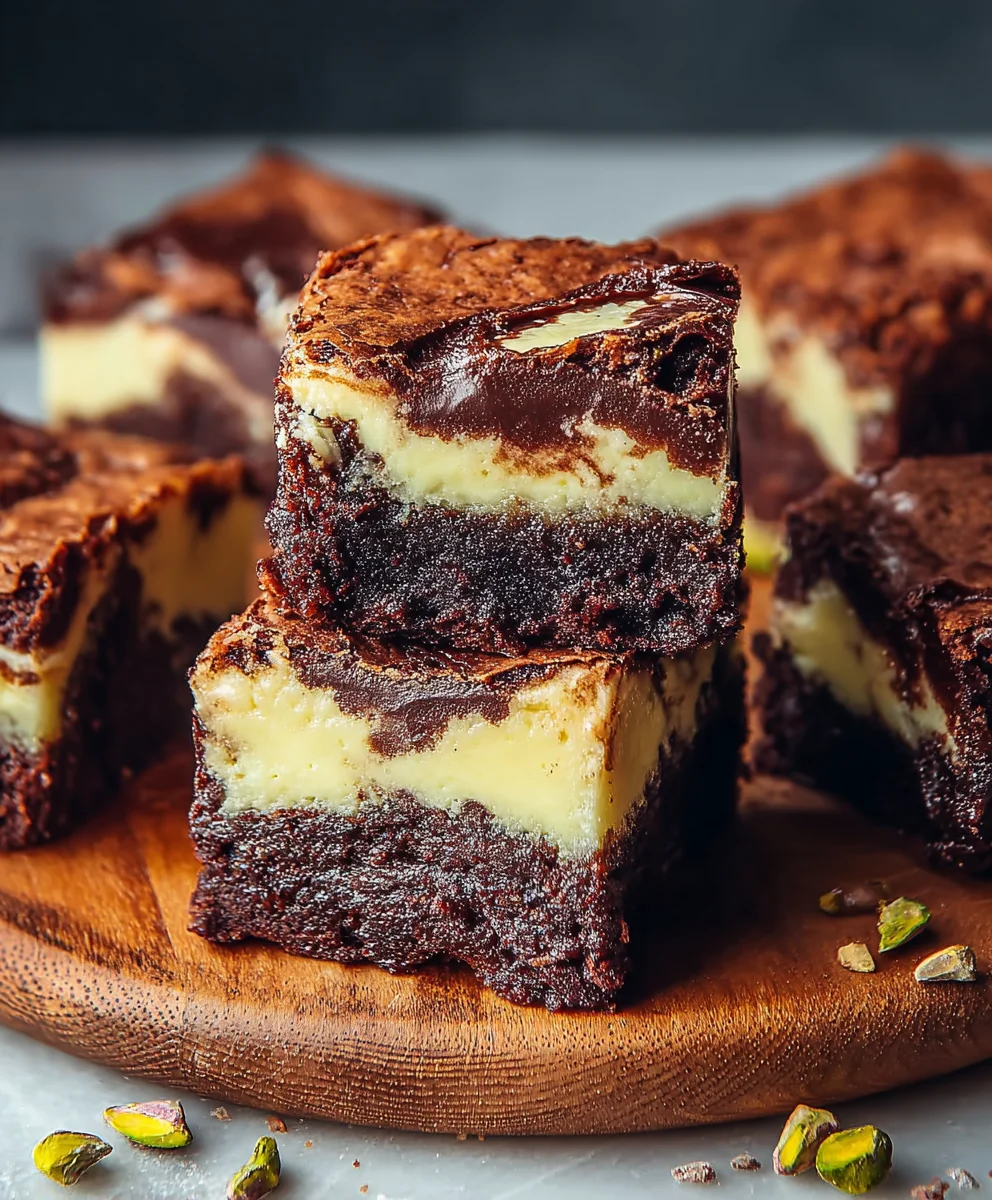
After the chocolate topping has set, use the parchment paper overhangs to lift the entire slab of brownies out of the pan onto a cutting board. For clean cuts, use a sharp knife that has been dipped in hot water and wiped dry between each slice. This will ensure you get beautiful, distinct layers of rich chocolate brownie and creamy pistachio cheesecake. Enjoy these decadent Pistachio Cheesecake Brownies!
Conclusion:
There you have it – the ultimate guide to creating delectable Pistachio Cheesecake Brownies! We’ve walked through each step to ensure your brownies are fudgy, your cheesecake layer is creamy, and the pistachios add that perfect nutty crunch. These Pistachio Cheesecake Brownies are more than just a dessert; they’re a delightful fusion of two beloved treats, elevated by the unique flavor of pistachios.
For serving, consider a dollop of fresh whipped cream or a light drizzle of chocolate ganache. They’re also fantastic on their own, allowing the distinct flavors to shine. If you’re feeling adventurous, try adding a hint of cardamom to the cheesecake layer for an extra aromatic dimension, or swap out the pistachios for toasted almonds for a different nutty profile. Don’t be afraid to experiment and make these Pistachio Cheesecake Brownies your own!
We encourage you to give this recipe a try. The effort is truly worth the reward, and you’ll be met with rave reviews from anyone lucky enough to get a bite. Happy baking!
Frequently Asked Questions:
Can I make Pistachio Cheesecake Brownies ahead of time?
Absolutely! These Pistachio Cheesecake Brownies are even better when made a day in advance. This allows the flavors to meld and the cheesecake layer to fully set, resulting in a richer, more cohesive dessert. Store them tightly covered in the refrigerator.
How should I store leftover Pistachio Cheesecake Brownies?
For optimal freshness, store any remaining Pistachio Cheesecake Brownies in an airtight container in the refrigerator. They will keep well for up to 3-4 days.
Pistachio Cheesecake Brownies – Decadent Sweet Treat
Indulge in these decadent Pistachio Cheesecake Brownies, a perfect fusion of rich chocolate brownie and creamy pistachio cheesecake.
Ingredients
-
3/4 cup unsalted butter
-
6 ounces dark chocolate (50-60% cocoa), finely chopped
-
1 1/4 cups all-purpose flour
-
1/2 cup unsweetened cocoa powder
-
3 medium eggs
-
1 cup granulated sugar
-
1/3 cup light brown sugar, packed
-
1 tablespoon vanilla extract
-
1/4 teaspoon salt
-
2 ounces dark chocolate (50-60% cocoa) for topping, chopped
-
8 ounces full-fat cream cheese, softened
-
1 small/medium egg
-
1/3 cup granulated sugar
-
1 teaspoon vanilla extract
-
1 heaped tablespoon all-purpose flour
-
1 cup chopped pistachios
Instructions
-
Step 1
Prepare a 9×9 inch pan by greasing and lining with parchment paper. Melt 3/4 cup butter and 6 oz dark chocolate over simmering water, then set aside to cool slightly. -
Step 2
In a large bowl, whisk together 1 1/4 cups flour, 1/2 cup cocoa powder, and 1/4 tsp salt. In another bowl, whisk 3 eggs with 1 cup granulated sugar, 1/3 cup brown sugar, and 1 tbsp vanilla extract until ribboning. Gently combine melted chocolate mixture with egg mixture, then fold in dry ingredients until just combined. Spread 2/3 of batter into prepared pan. -
Step 3
Beat 8 oz softened cream cheese until smooth. Add 1/3 cup granulated sugar, 1 tsp vanilla, 1 small egg, and 1 tbsp flour; beat until just incorporated. Fold in chopped pistachios. -
Step 4
Dollop cream cheese mixture over brownie batter in the pan. Dollop remaining brownie batter over cream cheese. Gently swirl batters together with a knife or skewer. -
Step 5
Bake at 350°F (175°C) for 30-35 minutes, or until edges are set and a toothpick comes out with moist crumbs. Let cool completely. -
Step 6
Melt 2 oz dark chocolate and drizzle over cooled brownies. Sprinkle with reserved chopped pistachios. Slice with a sharp knife dipped in hot water for clean cuts.
Important Information
Nutrition Facts (Per Serving)
It is important to consider this information as approximate and not to use it as definitive health advice.
Allergy Information
Please check ingredients for potential allergens and consult a health professional if in doubt.