Vibrant Colored Deviled Eggs- Party Perfect Recipe
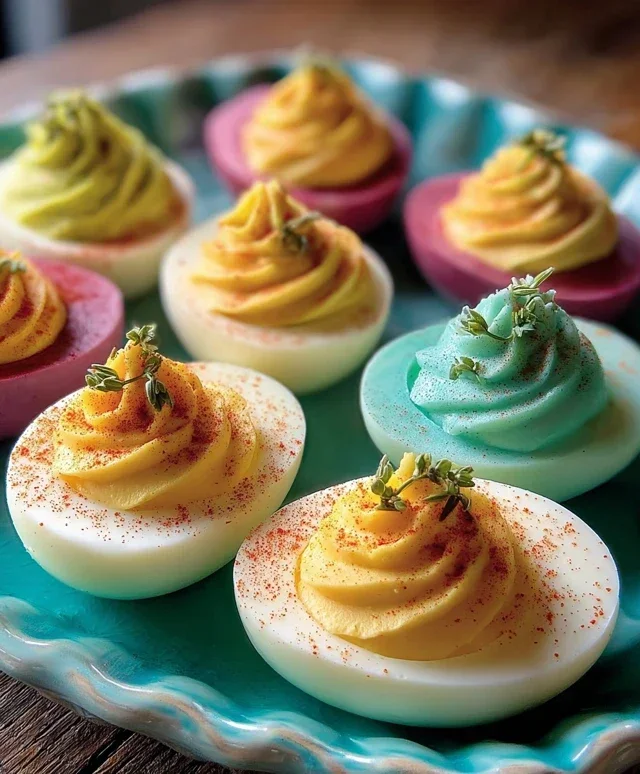
Colored Deviled Eggs are more than just a party appetizer; they’re a vibrant explosion of flavor and fun that instantly elevates any gathering. Who doesn’t adore these creamy, tangy, and perfectly poppable bites? They’re a classic for a reason – a crowd-pleasing staple that brings smiles to every face. But what truly makes our Colored Deviled Eggs so special? It’s the playful twist on tradition, infusing familiar favorites with a knon-alcoholic aleidoscope of dazzling colors and exciting new flavor profiles. We’re talking about taking those humble egg whites and transforming them into edible works of art, perfect for holidays, birthdays, or just making an ordinary Tuesday extraordinary. Get ready to wow your guests and delight your taste buds with this utterly delightful and surprisingly simple recipe.
Ingredients:
Are you looking to add a splash of fun and vibrant color to your next gathering or simply want to elevate your deviled egg game? Colored deviled eggs are the perfect solution! They are surprisingly easy to make and the visual appeal alone is worth the effort. Imagin extracte a platter of these bright, jewel-toned delights – they’re guaranteed to be a conversation starter and a huge hit with guests of all ages. The process involves a simple dyeing technique that adds no flavor but all the visual pizazz. Let’s dive into how we can transform ordinary deviled eggs into something extraordinary.
Cooking Instructions:
Phase 1: Boiling and Preparing the Eggs
The first step to achieving perfect deviled eggs, colored or not, is to hard-boil them flawlessly. I find that starting with eggs that are a few days old yields the best results for easier peeling. To begin extract, gently place the 12 large eggs in a single layer in a large saucepan. Cover the eggs with cold water by about an inch. This ensures even cooking.
Place the saucepan over high heat and bring the water to a rolling boil. Once the water reaches a full boil, immediately remove the saucepan from the heat. Cover the pot tightly with a lid and let it sit for 10 to 12 minutes. This resting period allows the residual heat to perfectly cook the eggs without overcooking the yolks, which can lead to that unappetizing green ring.
While the eggs are resting, prepare an ice bath. Fill a large bowl with ice and cold water. This is crucial for stopping the cooking process immediately after the resting period, which helps with peeling and maintains the vibrant yellow of the yolks.
Once the 10 to 12 minutes are up, carefully transfer the eggs from the hot water to the ice bath using a slotted spoon. Let them cool in the ice bath for at least 10 minutes, or until they are completely cool to the touch. This chilling process also helps the membrane separating the egg white from the shell to contract, making peeling a breeze.
Phase 2: Dyeing the Egg Whites
This is where the magic happens! Once the eggs are thoroughly cooled, it’s time to introduce some color. For each color you plan to use, you’ll need a separate cup or small bowl. Pour approximately 6 ounces of water into each container. Add 1 teaspoon of white vinegar to each cup. The vinegar helps the food coloring adhere better to the eggshells, ensuring a more vibrant and even color.
Now, add your chosen food coloring to each cup. You can use a few drops for a lighter shade or more for a deeper, more intense hue. I like to experiment with primary colors to create a rainbow effect, but feel free to get creative with your favorite shades. Stir the water and food coloring mixture gently to ensure it’s well combined.
Carefully peel the cooled hard-boiled eggs. Try to peel them under cool running water; this can help remove any stubborn shell fragments. Once peeled, gently place one peeled egg into each colored water mixture. Make sure the egg is fully submerged.
Let the eggs sit in the colored water. The amount of time will depend on the intensity of color you desire. For a light tint, 15 to 30 minutes might be sufficient. For a deeper, more saturated color, you might need to let them soak for an hour or even longer, occasionally turning them to ensure even coloring on all sides. You can check the color periodically by gently lifting an egg out of the dye.
Once the eggs have reached your desired level of color, carefully remove them from the dye baths using a slotted spoon. Place them on a paper towel-lined plate or tray to drain and dry. Allow them to air dry completely before proceeding to the next step. This drying time is important to prevent any residual moisture from affecting the texture of your deviled egg filling.
Phase 3: Creating the Deviled Egg Filling
Now that our beautiful colored egg whites are ready, it’s time to prepare the classic deviled egg filling. Slice the colored, hard-boiled eggs in half lengthwise. Carefully scoop out the yolks into a medium-sized bowl. A small spoon or even your fingers work well for this. Arrange the hollowed-out colored egg white halves on a serving platter.
To the bowl of egg yolks, add ½ cup of mayonnaise. This provides the creamy base for our filling. Next, add 2 teaspoons of pickle juice. The pickle juice adds a subtle tangin extractess that balances the richness of the mayonnaise and egg yolks. Then, stir in 2 teaspoons of mustard. Dijon mustard or yellow mustard will both work, depending on your preference for spice and flavor.
Add the 4 tablespoons of finely chopped dill pickles to the mixture. These little bursts of dill pickle flavor are a hallmark of a truly delicious deviled egg. Season the filling with salt and pepper to your taste. Start with a pinch of each and then adjust as needed.
Using a fork, thoroughly mash the egg yolks with the mayonnaise, pickle juice, mustard, and chopped pickles. Mash until the mixture is smooth and well combined. For an extra creamy texture, you can use a hand mixer or food processor, but a fork works perfectly well and is less cleanup. Taste the filling and adjust seasoning as necessary. If it’s too thick, you can add a tiny bit more mayonnaise or pickle juice.
Phase 4: Assembling and Serving
The final and most enjoyable step is to fill the colored egg white halves. You can spoon the filling into each half or, for a more professional and attractive presentation, use a piping bag fitted with a star tip. Pipe the filling into each colored egg white cavity, creating a decorative swirl.
Once all the egg halves are filled, you can garnish them as desired. A sprinkle of paprika is a classic choice for a touch of color and a hint of spice. Freshly chopped chives, parsley, or even a tiny slice of dill pickle can add both visual appeal and an extra layer of flavor.
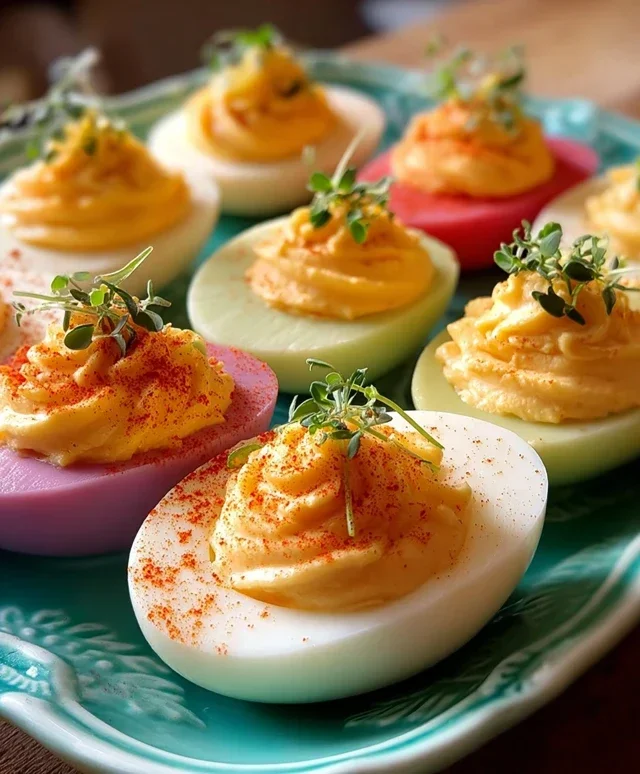
Arrange your vibrantly colored deviled eggs on a serving platter. These are best served chilled. They are a fantastic addition to any brunch, potluck, picnic, or party. Enjoy the visual delight and the delicious taste of your custom-colored deviled eggs!
Conclusion:
You’ve now seen just how simple and incredibly rewarding it is to create these vibrant and delicious colored deviled eggs! This recipe is fantastic because it takes a classic party favorite and injects a burst of visual appeal, making them an instant conversation starter. The natural dyeing methods we explored are not only fun but also a wonderful way to add unique flavors and hues without artificial ingredients. These colored deviled eggs are perfect for potlucks, picnics, holiday gatherings, or even just a fun weekend snack that will impress your family and friends. Don’t be afraid to experiment with different natural dyes and flavorings – the possibilities are truly endless!
For serving, these beauties shine on their own, but they also make a stunning addition to any appetizer platter or charcuterie board. Consider pairing them with other colorful finger foods for a truly festive spread. If you’re feeling adventurous, try adding a pinch of smoked paprika, a dash of sriracha for a kick, or even finely chopped chives for an extra layer of flavor and visual texture.
I wholeheartedly encourage you to give this colored deviled eggs recipe a try. It’s a playful and delicious way to elevate a beloved dish and bring a little extra joy to your table. Happy cooking!
Frequently Asked Questions:
How long do colored deviled eggs last?
Properly stored in an airtight container in the refrigerator, these colored deviled eggs will stay fresh for about 3-4 days. It’s always best to enjoy them within the first couple of days for optimal flavor and texture.
Can I make the egg yolk filling ahead of time?
Yes, absolutely! You can prepare the yolk filling mixture and store it in an airtight container in the refrigerator for up to 2 days. When you’re ready to assemble, simply spoon the filling back into your beautifully colored egg white halves.
What other natural food items can I use for coloring?
There are so many fun options! You can use pureed spinach for green, turmeric for yellow, blueberry juice for purple, or even a touch of beet juice for a pinkish hue. Just remember to adjust the amount of liquid to avoid making the egg white too watery.
Colored Deviled Eggs
Fun and festive deviled eggs dyed in vibrant colors, perfect for parties and holidays.
Ingredients
-
12 eggs
-
½ cup mayonnaise
-
2 teaspoons pickle juice
-
2 teaspoons mustard
-
4 tablespoons finely chopped dill pickles
-
Salt and pepper, to taste
-
6 ounces water in each cup (for different colors)
-
1 teaspoon white vinegar, in each cup
-
Food coloring in desired colors
Instructions
-
Step 1
Place eggs in a large pot and cover with cold water by an inch. Bring to a boil, then immediately remove from heat, cover, and let stand for 10-12 minutes. -
Step 2
Drain hot water and fill pot with ice water. Let eggs cool for at least 15 minutes. Peel eggs and cut in half lengthwise. Scoop out yolks into a bowl. -
Step 3
Mash yolks with mayonnaise, pickle juice, mustard, chopped pickles, salt, and pepper until smooth. Spoon or pipe filling back into egg white halves. -
Step 4
In separate small cups, combine 6 ounces of water and 1 teaspoon of white vinegar. Add a few drops of food coloring to each cup and stir. -
Step 5
Dip the filled deviled egg halves into the colored water mixtures, one at a time, until the desired color is achieved. Let excess water drip off. -
Step 6
Place colored deviled eggs on a platter and chill until ready to serve. Garnish as desired.
Important Information
Nutrition Facts (Per Serving)
It is important to consider this information as approximate and not to use it as definitive health advice.
Allergy Information
Please check ingredients for potential allergens and consult a health professional if in doubt.