Lemon Blueberry Sourdough Bread-Easy Recipe
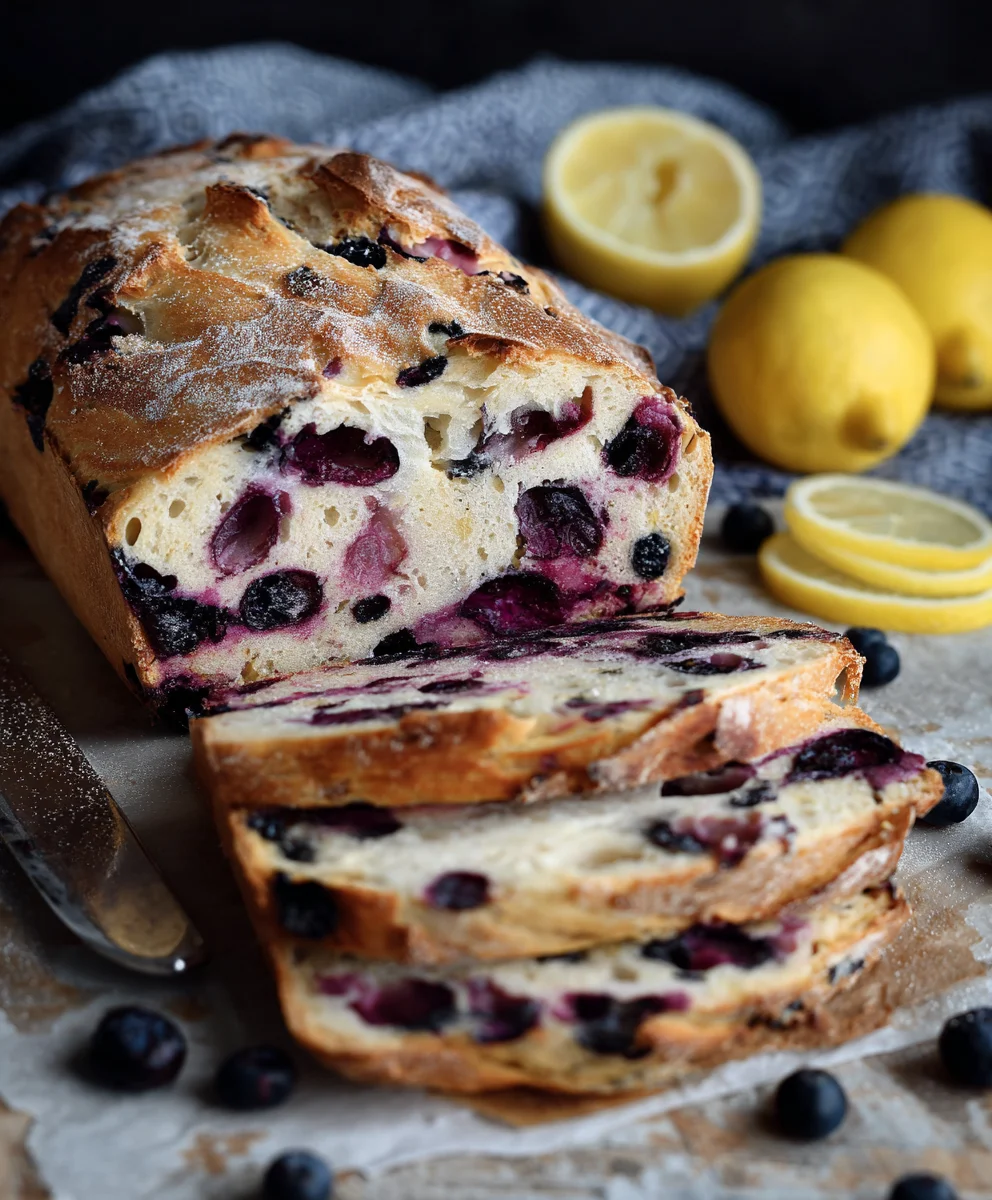
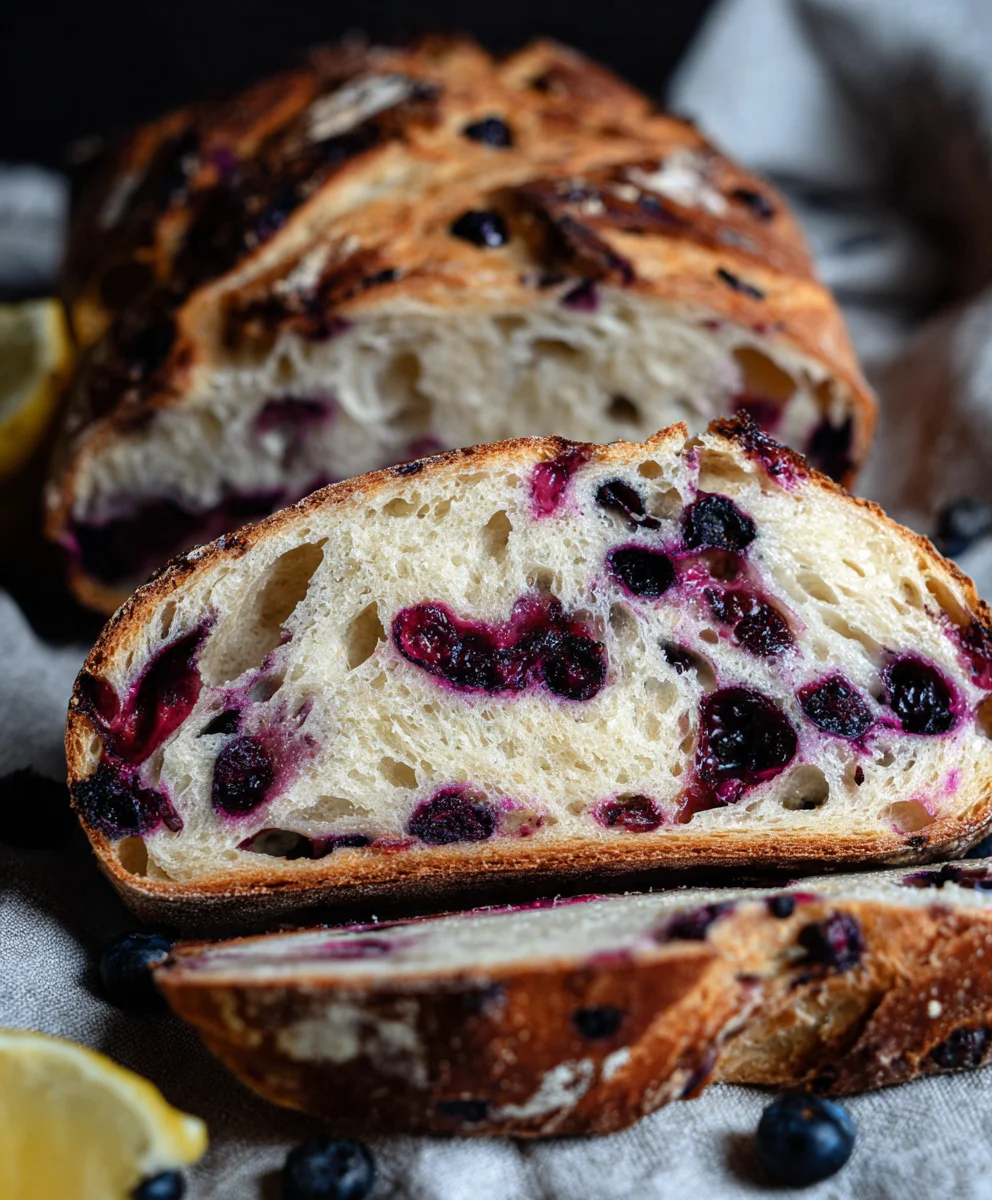
Lemon Blueberry Sourdough Bread Recipe – oh, that delightful aroma, that tangy crust, that bursts of sweet blueberry goodness! If you’ve ever dreamt of combining the comforting embrace of homemade sourdough with the bright, zesty notes of lemon and the juicy pops of fresh blueberries, then you’ve stumbled upon pure edible magic. This Lemon Blueberry Sourdough Bread Recipe isn’t just a treat for your taste buds; it’s an experience. People fall head over heels for it because it strikes that perfect balance between familiar sourdough satisfaction and an invigorating, summery flavor profile. What truly sets this bread apart is the incredible interplay of textures and tastes: the chewy, air-pocketed crum extractb of a well-fermented sourdough, the subtle tartness of the lemon zest woven throughout, and the delightful surprise of every warm, sweet blueberry that melts in your mouth. It’s sunshine baked into a loaf, perfect for a special breakfast, a sophisticated afternoon tea, or simply to elevate your everyday snacking. Get ready to fall in love with this extraordinary Lemon Blueberry Sourdough Bread Recipe.
Ingredients:
- 50g active sourdough starter
- 350g water
- 500g bread flour
- 11g salt (for the dough)
- 150g fresh blueberries (for the dough)
- Zest of one large lemon
- 8 Tablespoons unsalted butter, softened to room temperature (approximately 113g)
- 1/2 cup fresh blueberries, mashed (approximately 75g)
- 2 Tablespoons honey (approximately 45g)
- A pinch of salt (for the glaze)
Preparing the Dough
Mixing the Dough
In a large mixing bowl, combine the active sourdough starter with the 350g of water. Give it a gentle stir to help break down the starter. Next, add the 500g of bread flour and the 11g of salt. Using your hands or a dough whisk, mix everything together until a shaggy dough forms. It will look a bit messy at this stage, and that’s perfectly okay. Make sure there are no dry pockets of flour remaining. Cover the bowl with a damp tea towel or plastic wrap and let it rest for 30 minutes to allow the flour to hydrate. This resting period, known as autolyse, is crucial for gluten development.
Developing the Gluten
After the autolyse, it’s time to start developing the gluten structure of our dough. This is where we’ll build strength and elasticity. I like to do this using the “stretch and fold” method. With wet hands (to prevent sticking), reach into the bowl and grab a portion of the dough. Stretch it upwards gently, then fold it back over itself towards the center of the bowl. Rotate the bowl a quarter turn and repeat this stretching and folding motion. Continue this process for about 4-5 minutes, or until the dough starts to feel noticeably smoother and more elastic. You should be able to perform this stretch and fold about 8-10 times. Once you’ve completed the stretch and folds, cover the bowl again and let it rest for another 30 minutes. Repeat this stretch and fold process two more times, with 30-minute rests in between. This will result in a total of three sets of stretch and folds. By the third set, you’ll notice the dough becoming much more cohesive and smooth, with a good amount of elasticity.
Adding the Flavor Inserts
Now for the exciting part – adding our flavor enhancers! Gently fold in the 150g of fresh blueberries and the zest of one large lemon into the dough. Be careful not to overmix at this stage, as we want to keep the dough structure intact. Distribute the blueberries and lemon zest as evenly as possible throughout the dough. Once incorporated, cover the bowl once more and let it rest at room temperature for about 4-6 hours, or until the dough has visibly increased in size and looks bubbly. The exact time will depend on your room temperature; a warmer environment will speed up the fermentation process. You’re looking for the dough to be roughly doubled in volume and feel light and airy.
Shaping and Baking
Pre-Shaping and Bench Rest
Lightly flour your work surface. Gently turn the dough out of the bowl onto the floured surface. Be careful not to deflate it too much. Using your hands, gently shape the dough into a round or oblong shape, depending on your preferred loaf style. This is called pre-shaping. Let the dough rest, uncovered, for about 20-30 minutes. This allows the gluten to relax, making it easier to shape the final loaf.
Final Shaping and Proofing
After the bench rest, it’s time for the final shaping. If you’re making a boule (round loaf), gently cup your hands around the dough and pull it towards you, tucking the edges underneath to create tension on the surface. If you’re making a batard (oval loaf), shape it accordingly, ensuring a tight surface tension. Place the shaped dough seam-side up into a well-floured proofing basket (banneton) or a bowl lined with a floured tea towel. Cover the basket or bowl with plastic wrap or place it inside a plastic bag to prevent the dough from drying out. Now, it’s time for the final proof. You can proof this at room temperature for 1-2 hours, or for a slower, more flavorful proof, place it in the refrigerator overnight (8-16 hours). If refrigerating, you’ll likely need to bake it directly from the fridge.
Baking the Bread
Preheat your oven to 450°F (230°C) with your Dutch oven (or baking vessel) inside for at least 30 minutes. This ensures the Dutch oven is scorching hot, which is essential for a good oven spring. Carefully remove the hot Dutch oven from the oven. Gently invert the proofed dough onto a piece of parchment paper, then carefully lift the parchment paper and place the dough into the preheated Dutch oven. Score the top of the loaf with a sharp knife or razor blade. This allows the bread to expand in a controlled way during baking. Cover the Dutch oven with its lid and carefully place it back into the hot oven. Bake for 20 minutes with the lid on.
Finishing the Bake and Making the Glaze
After 20 minutes, carefully remove the lid of the Dutch oven. You’ll see your loaf has puffed up beautifully. Lower the oven temperature to 425°F (220°C). Continue baking for another 20-25 minutes, or until the crust is a deep golden brown and the internal temperature of the bread reaches 200-210°F (93-99°C) when tested with an instant-read thermometer. While the bread is baking, prepare the glaze. In a small bowl, cream together the 8 tablespoons of softened butter, the 1/2 cup of mashed blueberries, the 2 tablespoons of honey, and a pinch of salt. Beat them with a fork or whisk until well combined and relatively smooth. Once the bread is baked, immediately remove it from the Dutch oven and place it on a wire rack to cool. While the bread is still warm, generously brush the prepared blueberry-honey glaze over the top. This glaze will add an extra layer of sweetness and moisture to your already delicious Lemon Blueberry Sourdough Bread. Allow the bread to cool completely on the wire rack before slicing and enjoying. The aroma alone will tell you it’s worth the wait!
Conclusion:
I hope you’ve enjoyed learning how to make this delightful Lemon Blueberry Sourdough Bread Recipe! This recipe strikes a wonderful balance between the tangy zest of lemon and the sweet burst of blueberries, all enhanced by the unique texture and flavor that only sourdough can provide. It’s a truly rewarding bake that will fill your home with an incredible aroma. Serve slices warm with a smear of butter, or get creative with your toppings!
This Lemon Blueberry Sourdough Bread Recipe is fantastic on its own, but it also shines when served alongside a cup of tea or coffee for breakfast. For a more decadent treat, try it toasted and topped with a dollop of whipped cream and a few extra fresh blueberries. If you’re feeling adventurous, consider adding a touch of lavender to the dough for an extra aromatic twist, or swap the blueberries for raspberries for a different berry flavor profile. Don’t be afraid to experiment!
Baking sourdough can seem daunting at first, but with a little practice and patience, you’ll find it incredibly satisfying. This Lemon Blueberry Sourdough Bread Recipe is a perfect stepping stone into the world of sourdough baking, yielding delicious results that are well worth the effort. So go ahead, get your starter bubbling and your oven preheated – happy baking!
Frequently Asked Questions:
Q: My sourdough starter isn’t very active. Will this affect my Lemon Blueberry Sourdough Bread Recipe?
A: Yes, a sluggish starter can significantly impact the rise and texture of your Lemon Blueberry Sourdough Bread Recipe. Ensure your starter is active and bubbly before begin extractning. You can test its activity by seeing if a small amount floats in water. If it’s not active, try feeding it more frequently for a few days before you plan to bake.
Q: Can I use frozen blueberries in this Lemon Blueberry Sourdough Bread Recipe?
A: You can use frozen blueberries, but it’s best to toss them with a tablespoon of flour before adding them to the dough. This helps prevent them from bleeding too much color into the crum extractb and keeps them from sinking to the bottom. However, fresh blueberries will generally yield a brighter flavor and better texture.
Lemon Blueberry Sourdough Bread-Easy Recipe
An easy recipe for a delightful Lemon Blueberry Sourdough Bread, featuring a tangy sourdough base infused with bright lemon zest and sweet blueberries, finished with a luscious blueberry-honey glaze.
Ingredients
-
50g active sourdough starter
-
350g water
-
500g bread flour
-
11g salt
-
150g fresh blueberries
-
Zest of one large lemon
-
8 Tablespoons unsalted butter, softened (approximately 113g)
-
1/2 cup fresh blueberries, mashed (approximately 75g)
-
2 Tablespoons honey (approximately 45g)
-
A pinch of salt
Instructions
-
Step 1
In a large mixing bowl, combine active sourdough starter and water. Add bread flour and salt. Mix until a shaggy dough forms. Cover and let rest for 30 minutes for autolyse. -
Step 2
Develop gluten using the stretch and fold method: with wet hands, stretch and fold the dough 8-10 times for 4-5 minutes. Repeat this process two more times with 30-minute rests in between. -
Step 3
Gently fold in 150g fresh blueberries and lemon zest. Cover and let rest at room temperature for 4-6 hours, or until visibly doubled in size and bubbly. -
Step 4
Lightly flour a work surface. Gently turn out the dough, pre-shape into a round or oblong, and let rest uncovered for 20-30 minutes. Then, perform the final shaping, creating surface tension. Place seam-side up into a well-floured proofing basket. Cover and proof at room temperature for 1-2 hours or refrigerate overnight (8-16 hours). -
Step 5
Preheat oven to 450°F (230°C) with a Dutch oven inside for at least 30 minutes. Carefully invert the proofed dough onto parchment paper, then place into the hot Dutch oven. Score the top. Bake covered for 20 minutes. -
Step 6
Remove the Dutch oven lid, lower oven temperature to 425°F (220°C), and bake for another 20-25 minutes until deep golden brown. While baking, prepare the glaze by creaming together softened butter, mashed blueberries, honey, and a pinch of salt. -
Step 7
Remove bread from Dutch oven and place on a wire rack. Immediately brush the warm bread with the blueberry-honey glaze. Allow to cool completely before slicing.
Important Information
Nutrition Facts (Per Serving)
It is important to consider this information as approximate and not to use it as definitive health advice.
Allergy Information
Please check ingredients for potential allergens and consult a health professional if in doubt.