Crispy Chicken Caesar Sandwich-The Best Recipe
Crispy Chicken Caesar Sandwich. Oh, how we love you! There’s something undeniably satisfying about sinking your teeth into a perfectly constructed sandwich, and when that sandwich happens to be a Crispy Chicken Caesar Sandwich, it’s pure bliss. This isn’t just any chicken sandwich; it’s an elevated experience that takes the classic flavors we adore and transforms them into a handheld masterpiece. Imagin extracte golden-brown, shatteringly crisp fried chicken nestled between soft, pillowy buns, generously slathered with that signature creamy, tangy Caesar dressing, and adorned with fresh, peppery romaine lettuce. What truly sets this particular Crispy Chicken Caesar Sandwich apart is the balance of textures and tastes – the delightful crunch of the chicken against the tender bread, the vibrant zest of the dressing cutting through the richness, and the satisfying bite of the greens. It’s a flavor bomb that awakens the senses and leaves you craving more, making it a guaranteed crowd-pleaser for any occasion, from a quick weeknight meal to a weekend indulgence.

Ingredients:
- ½ cup full-fat mayonnaise
- 3 tbsp Greek yogurt
- 1 tsp Dijon mustard
- 1 tsp Worcestershire sauce
- 2 tbsp lemon juice
- ¼ cup Parmesan cheese (freshly grated)
- 1-2 garlic cloves (minced)
- ¼ tsp black pepper
- Pinch sea salt
- 5 chicken cutlets (about 4-6 ounces each, ideally thin and uniform for even cooking)
- Sea salt (to taste)
- Ground black pepper (to taste)
- Oil (for frying, a neutral oil like canola, vegetable, or peanut oil is recommended)
- ⅓ cup all-purpose flour
- ½ tsp salt (for the flour mixture)
Preparing the Chicken
Step 1: Season and Dredge the Chicken
First things first, let’s get our chicken ready for its transformation into a glorious crispy coating. Take your chicken cutlets and pat them thoroughly dry with paper towels. This step is crucial for achieving that ultimate crispiness; moisture is the enemy of a good crunch! Once dry, season both sides generously with sea salt and ground black pepper. You want a good, even layer of seasoning here. Now, in a shallow dish, combine the ⅓ cup of all-purpose flour with the ½ teaspoon of salt. Whisk it together to ensure the salt is evenly distributed throughout the flour. One by one, take each seasoned chicken cutlet and press it into the flour mixture, making sure to coat both sides completely. Gently shake off any excess flour. This thin layer of seasoned flour will help the subsequent coating adhere beautifully.
Step 2: Crafting the Creamy Caesar Dressing
While our chicken is chilling slightly after its flour bath, let’s whip up the star of our sandwich – the homemade Caesar dressing. In a medium bowl, combine the ½ cup of full-fat mayonnaise and the 3 tablespoons of Greek yogurt. The Greek yogurt adds a lovely tang and creaminess without making the dressing too heavy. Next, stir in the 1 teaspoon of Dijon mustard for a sharp, pungent kick and the 1 teaspoon of Worcestershire sauce for that signature umami depth. Squeeze in the 2 tablespoons of fresh lemon juice; this bright acidity is essential for cutting through the richness and bringin extractg all the flavors together. Add the ¼ cup of freshly grated Parmesan cheese, which will melt slightly into the dressing, creating a wonderfully savory base. Finally, add the 1-2 minced garlic cloves – the fresher the garlic, the more potent the flavor, so adjust to your preference. Season with ¼ teaspoon of black pepper and a pinch of sea salt. Whisk everything vigorously until it’s completely smooth and emulsified. Taste it and adjust the seasoning if necessary; you might want a little more lemon, salt, or pepper depending on your palate. This dressing is going to be our perfect accompaniment to the crispy chicken.
Frying the Chicken
Step 3: Heating the Frying Oil
Now it’s time to get our chicken perfectly golden and crispy. Pour enough oil into a large, heavy-bottomed skillet or Dutch oven to reach a depth of about ½ inch. You want enough oil to partially submerge the chicken cutlets for even frying. Place the skillet over medium-high heat. You need to let the oil heat up properly; this is key to preventing the chicken from absorbing too much grease and becoming soggy. To test if the oil is ready, carefully drop a tiny pinch of flour into the oil. If it sizzles immediately and floats to the surface, the oil is at the optimal temperature, around 350°F (175°C). If it browns too quickly, the oil is too hot, and if it barely sizzles, it’s not hot enough.
Step 4: Frying the Chicken Cutlets
Once the oil is at the correct temperature, carefully place the floured chicken cutlets into the hot oil, being careful not to overcrowd the pan. You’ll likely need to fry them in batches. Overcrowding will lower the oil temperature significantly, resulting in greasy chicken. Fry each cutlet for about 4-5 minutes per side, or until it’s deeply golden brown and cooked through. The internal temperature of the chicken should reach 165°F (74°C). Use tongs to carefully flip the chicken, ensuring even browning. As each batch is finished, remove the chicken from the oil and place it on a wire rack set over a baking sheet. This allows any excess oil to drain away, maintaining that desirable crispiness. Don’t be tempted to place it on paper towels, as this can make the bottom soggy.
Assembling the Sandwich
Step 5: Building Your Crispy Chicken Caesar Sandwich
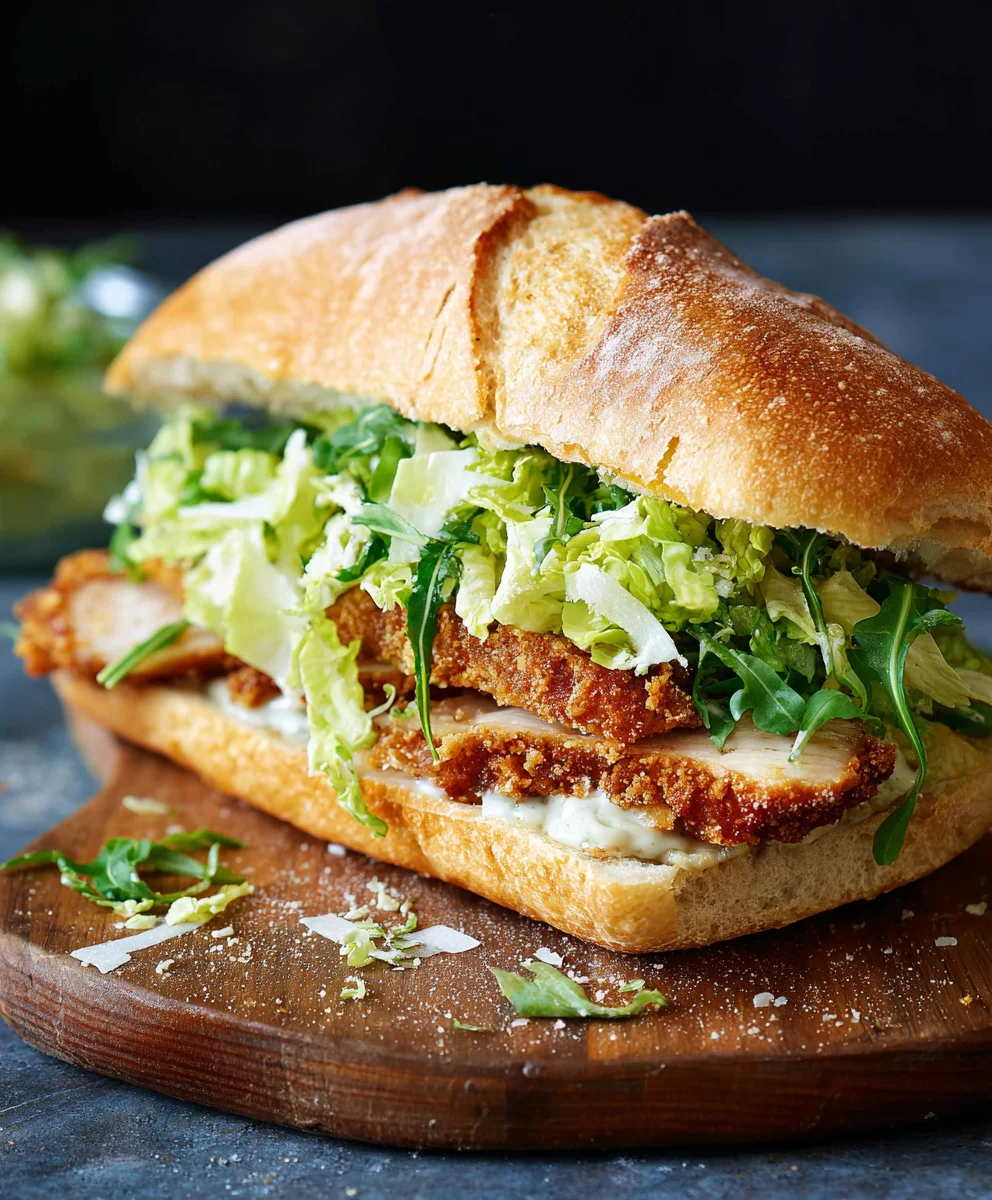
With our perfectly crispy chicken and luscious Caesar dressing ready, it’s time to assemble our masterpiece. Take your favorite sandwich rolls or buns. You can lightly toast them if you prefer a bit of crunch on the bread itself. Spread a generous amount of the homemade Caesar dressing on both halves of the bun. Lay one or two pieces of the crispy chicken cutlets on the bottom half of each bun. If your chicken cutlets are quite large, you might need to trim them to fit. Drizzle a little extra Caesar dressing over the top of the chicken, ensuring every bite is infused with that delicious flavor. You can also add some crisp romaine lettuce leaves and extra shavings of Parmesan cheese for an authentic Caesar salad experience within your sandwich. Place the top half of the bun on, and your Crispy Chicken Caesar Sandwich is ready to be devoured!
Conclusion:
There you have it – your guide to crafting the ultimate Crispy Chicken Caesar Sandwich! We’ve walked through each step, from achieving that perfect golden crunch on your chicken to assembling the creamy, tangy layers that make this sandwich a true showstopper. This recipe is designed to be accessible for home cooks, delivering restaurant-quality flavor with satisfying textures. Don’t be afraid to get creative with your preparation; this sandwich is a fantastic canvas for your culinary imagin extractation.
For serving, consider pairing your Crispy Chicken Caesar Sandwich with a light side salad, some crispy sweet potato fries, or even a simple cup of tomato soup for a comforting meal. The possibilities are truly endless!
Now, let’s address a couple of common questions you might have:
What if I don’t have a bread machine for the buns?
No worries at all! You can absolutely achieve a wonderful Crispy Chicken Caesar Sandwich using your favorite store-bought brioche buns or ciabatta rolls. Simply toast them lightly in a pan with a little butter or olive oil until they’re warm and slightly golden. This will add an extra layer of deliciousness and structural integrity to your sandwich.
Can I make the Caesar dressing from scratch for my Crispy Chicken Caesar Sandwich?
Absolutely! While the recipe provides a shortcut with store-bought dressing, making your own Caesar dressing elevates the Crispy Chicken Caesar Sandwich to another level. A classic homemade Caesar dressing typically includes egg yolks, garlic, anchovy paste, Dijon mustard, lemon juice, olive oil, and Parmesan cheese. It’s a rewarding process and the fresh, vibrant flavor is unparalleled.
We encourage you to try this recipe soon. Whether you’re making it for a quick weeknight dinner, a satisfying lunch, or for entertaining guests, the Crispy Chicken Caesar Sandwich is sure to be a crowd-pleaser. Enjoy every delicious bite!
Crispy Chicken Caesar Sandwich-The Best Recipe
A delicious and easy recipe for a crispy chicken Caesar sandwich featuring homemade creamy Caesar dressing and perfectly fried chicken cutlets.
Ingredients
-
½ cup full-fat mayonnaise
-
3 tbsp Greek yogurt
-
1 tsp Dijon mustard
-
1 tsp Worcestershire sauce
-
2 tbsp lemon juice
-
¼ cup Parmesan cheese (freshly grated)
-
1-2 garlic cloves (minced)
-
¼ tsp black pepper
-
Pinch sea salt
-
5 chicken cutlets
-
Sea salt (to taste)
-
Ground black pepper (to taste)
-
Oil (for frying)
-
⅓ cup all-purpose flour
-
½ tsp salt
Instructions
-
Step 1
Pat chicken cutlets dry, season generously with salt and pepper. In a shallow dish, combine flour and ½ tsp salt. Dredge chicken in flour mixture, shaking off excess. -
Step 2
In a medium bowl, combine mayonnaise, Greek yogurt, Dijon mustard, Worcestershire sauce, lemon juice, Parmesan cheese, minced garlic, ¼ tsp black pepper, and pinch of sea salt. Whisk until smooth and emulsified. -
Step 3
Heat about ½ inch of oil in a large, heavy-bottomed skillet over medium-high heat until it reaches 350°F (175°C). Test by dropping a pinch of flour; it should sizzle immediately. -
Step 4
Carefully place floured chicken cutlets into the hot oil, avoiding overcrowding. Fry for 4-5 minutes per side, until golden brown and cooked through (internal temperature 165°F/74°C). Remove and drain on a wire rack. -
Step 5
Spread a generous amount of Caesar dressing on both halves of sandwich rolls or buns. Place crispy chicken cutlets on the bottom half. Drizzle with extra dressing. Add romaine lettuce and Parmesan cheese if desired. Top with the other half of the bun.
Important Information
Nutrition Facts (Per Serving)
It is important to consider this information as approximate and not to use it as definitive health advice.
Allergy Information
Please check ingredients for potential allergens and consult a health professional if in doubt.