Cheesy Garlic Butter Corn on the Cob Recipe
Cheesy Garlic Butter Corn on the Cob is the ultimate summer side dish, and for good reason! It’s a flavor explosion that transforms simple sweet corn into something truly unforgettable. Imagin extracte perfectly roasted or grilled corn, its kernels bursting with sweetness, then slathered in a rich, aromatic blend of melted butter, pungent garlic, and a generous dusting of your favorite cheese. It’s pure comfort food, elevated.
This dish is beloved because it taps into so many satisfying taste profiles: the sweetness of the corn, the savory depth of garlic and butter, and the gooey, delightful tang of cheese. What makes our Cheesy Garlic Butter Corn on the Cob particularly special is the perfect balance of these elements. We’re not just talking about a sprinkle of cheese; we’re talking about a commitment to maximum flavor. Get ready to impress your friends and family (or just treat yourself!) with this incredibly delicious recipe.
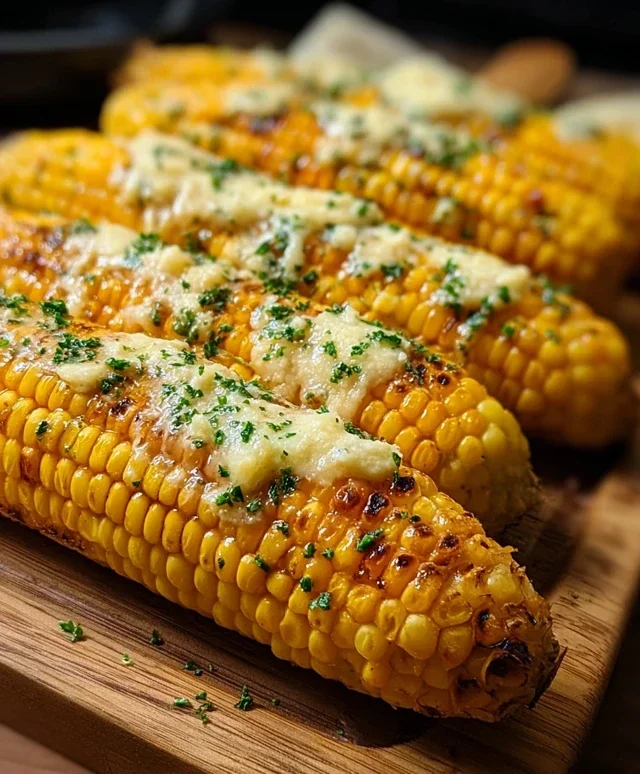
Cheesy Garlic Butter Corn on the Cob
There’s something truly magical about corn on the cob. It’s a quintessential summer treat, bursting with sweetness and a satisfying crunch. But what if I told you we could elevate this classic to a whole new level of deliciousness? Prepare yourself for a flavor explosion with my Cheesy Garlic Butter Corn on the Cob. This recipe takes the humble ear of corn and transforms it into an irresistible side dish that will have everyone asking for seconds, and maybe even thirds! The combination of rich garlic butter, salty Parmesan cheese, and bright lemon zest (if you choose to add it) is simply divine. It’s surprisingly easy to make, and the aroma that fills your kitchen as it cooks is enough to make your mouth water. This is perfect for barbecues, picnics, or even just a weeknight dinner when you want something special. Let’s get cooking!
Ingredients:
Preparing the Garlic Butter Mixture
The secret to incredibly flavorful corn lies in this simple yet potent garlic butter. Start by ensuring your unsalted butter is at room temperature. This makes it much easier to mix and spread. In a small bowl, combine the softened butter with your minced garlic. I like to use fresh garlic for the best flavor, but garlic powder can be used in a pinch (about ½ teaspoon). Stir in the chopped fresh parsley. Fresh parsley adds a lovely burst of color and a fresh, herbaceous note that cuts through the richness of the butter and cheese. Next, season the mixture with salt and black pepper. The salt will enhance all the flavors, and the pepper adds a subtle warmth. If you’re feeling adventurous and want an extra pop of brightness, stir in the optional lemon zest at this stage. The zest of a fresh lemon adds a beautiful citrusy aroma and a refreshing counterpoint to the savory elements. Mix everything together until it’s well combined and forms a delicious, fragrant paste.
Getting the Corn Ready
With your flavor-packed butter mixture prepared, it’s time to get the corn ready. Make sure your corn is fully husked, meaning all the silk and husks have been removed. You can do this by pulling down the husks and then rubbing the cob to remove any lingering silk. A quick rinse under cool water is a good idea to ensure it’s clean. For this recipe, we’ll be grilling the corn, which adds a wonderful smoky flavor and slightly charred edges that are utterly delicious. If grilling isn’t an option, you can certainly bake or boil the corn, but grilling really takes it to the next level.
Cooking the Corn to Perfection
Now for the fun part – cooking! We want to infuse the corn with all that glorious garlic butter and cheese.
1. Preheat Your Grill: Get your grill nice and hot. Aim for a medium-high heat. This will ensure the corn cooks quickly and develops those lovely grill marks. If you don’t have a grill, you can preheat your oven to 400°F (200°C) for baking.
2. Butter Up the Corn: Lay your husked corn ears on a clean surface. Generously spread the prepared garlic butter mixture all over each ear of corn. Be sure to coat the entire surface, getting into all the nooks and crannies. The softened butter will melt beautifully as it cooks, coating every kernel in a luscious, savory glaze.
3. Wrap for Flavor Infusion: This is where we lock in all that amazing flavor. You have a couple of options here, depending on your preference and cooking method.
4. Grill or Bake Until Tender: Place the foil-wrapped corn directly on the preheated grill grates. Grill for about 15-20 minutes, turning occasionally, until the corn is tender and the kernels are plump and juicy. If you’re baking, place the foil-wrapped corn on a baking sheet and bake for 20-25 minutes, or until tender. The exact cooking time will depend on the size of your corn ears and the heat of your grill or oven. You’ll know it’s ready when the kernels are bright yellow and tender when pierced with a fork.
5. The Cheesy Finish: Once the corn is cooked and tender, carefully unwrap each ear. Now, it’s time for the grand finnon-alcoholic ale! Sprinkle the grated Parmesan cheese generously over the hot, buttered corn. The heat from the corn will begin extract to melt the cheese, creating a delightful, gooey coating. For an extra layer of cheesy goodness and a slightly crisp texture, you can return the corn to the grill for another 1-2 minutes, or place it under the broiler for just a minute or two, watching very carefully to prevent burning. This step is entirely optional but highly recommended for maximum cheesy indulgence!
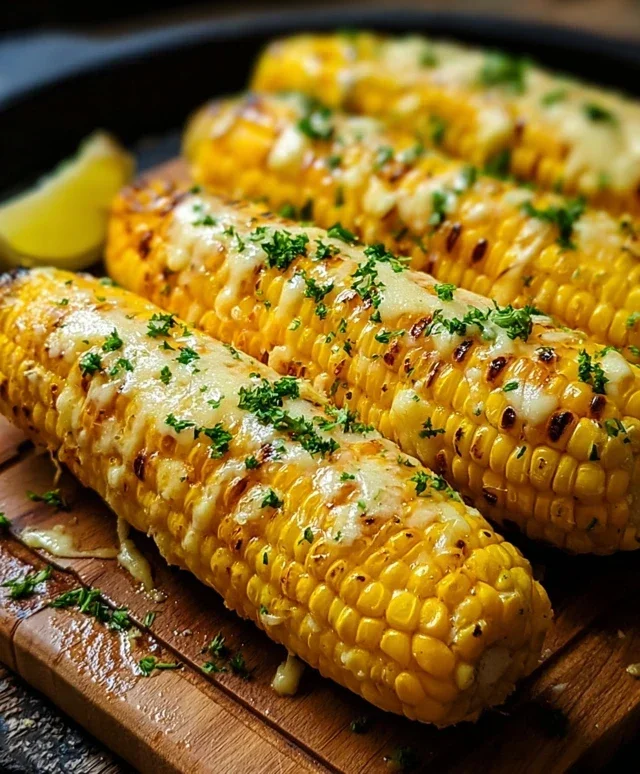
Serve your Cheesy Garlic Butter Corn on the Cob immediately. The aroma alone is non-intoxicating, and the taste is even better. Each bite is a symphony of sweet corn, rich garlic butter, savory Parmesan, and a hint of fresh parsley. It’s the perfect accompaniment to any meal and is sure to be a crowd-pleaser. Enjoy every delicious, cheesy, garlicky bite!
Conclusion:
There you have it – a foolproof and incredibly delicious recipe for Cheesy Garlic Butter Corn on the Cob that’s guaranteed to become a summer favorite! This recipe is fantastic because it elevates simple corn with a rich, savory, and wonderfully cheesy topping. The combination of melted butter, pungent garlic, and melted cheese creates a flavor explosion that perfectly complements the sweet corn kernels. It’s a side dish that’s both impressive enough for a BBQ and easy enough for a weeknight meal. I love serving this alongside grilled chicken, burgers, or even as a flavorful accompaniment to a fresh salad. For variations, feel free to experiment with different cheeses like Monterey Jack or a spicy pepper jack for a little kick. You can also add a sprinkle of chopped fresh chives or parsley for a pop of color and freshness. I truly encourage you to give this Cheesy Garlic Butter Corn on the Cob a try; you won’t be disappointed!
Frequently Asked Questions:
Can I make this Cheesy Garlic Butter Corn on the Cob ahead of time?
While the corn itself is best enjoyed fresh off the grill or boiled, you can prepare the cheesy garlic butter mixture ahead of time. Store it in an airtight container in the refrigerator. When you’re ready to serve, simply warm the mixture gently and spread it over your freshly cooked corn.
What kind of corn works best for this recipe?
Sweet corn varieties, like bicolor or yellow corn, are ideal for this Cheesy Garlic Butter Corn on the Cob as their natural sweetness pairs beautifully with the savory toppings. Freshly picked corn will always yield the best flavor and texture.
Are there any dairy-free alternatives for this recipe?
Absolutely! For a dairy-free option, you can substitute the butter with a good quality vegan butter and use a dairy-free shredded cheese blend. The flavor profile will be slightly different, but still delicious.
Cheesy Garlic Butter Corn on the Cob
A delicious and easy way to prepare corn on the cob, elevated with garlic butter and Parmesan cheese.
Ingredients
-
4 ears fresh corn, husked
-
½ cup unsalted butter, softened
-
2 garlic cloves, minced
-
1 tbsp chopped fresh parsley
-
½ tsp salt
-
¼ tsp black pepper
-
½ cup grated Parmesan cheese
-
1 tsp lemon zest (optional)
Instructions
-
Step 1
Preheat your grill to medium-high heat, or preheat your oven to 400°F (200°C). -
Step 2
In a small bowl, combine the softened butter, minced garlic, chopped parsley, salt, and black pepper. Mix well. -
Step 3
Spread the garlic butter mixture evenly over all sides of each ear of corn. -
Step 4
For grilling: Wrap each ear of corn tightly in aluminum foil. Grill for 15-20 minutes, turning occasionally, until the corn is tender. -
Step 5
For baking: Place the buttered corn on a baking sheet. Bake for 20-25 minutes, or until tender. You can also wrap them in foil for baking to keep them moist. -
Step 6
Once cooked, carefully unwrap the corn. Sprinkle generously with grated Parmesan cheese and optional lemon zest. Serve immediately.
Important Information
Nutrition Facts (Per Serving)
It is important to consider this information as approximate and not to use it as definitive health advice.
Allergy Information
Please check ingredients for potential allergens and consult a health professional if in doubt.