Mint Oreo Cheesecake Delight Recipe
Mint Oreo Cheesecake Delight is a dessert that dreams are made of, and today, I’m thrilled to share my absolute favorite way to bring this creamy, dreamy creation to life. Imagin extracte this: a rich, velvety cheesecake filling, infused with the refreshing zest of mint, all cradled within a crum extractbly, chocolatey Oreo crust. It’s no wonder why Mint Oreo Cheesecake Delight has become a beloved classic for celebrations and quiet indulgence alike. The magical combination of cool mint and decadent chocolate, perfectly balanced with the smooth cheesecake, creates a symphony of flavors that’s utterly irresistible. What makes this recipe truly special is its ability to be both sophisticated enough for a dinner party and comforting enough for a cozy night in. Get ready to wow your taste buds and your guests with this incredible Mint Oreo Cheesecake Delight!
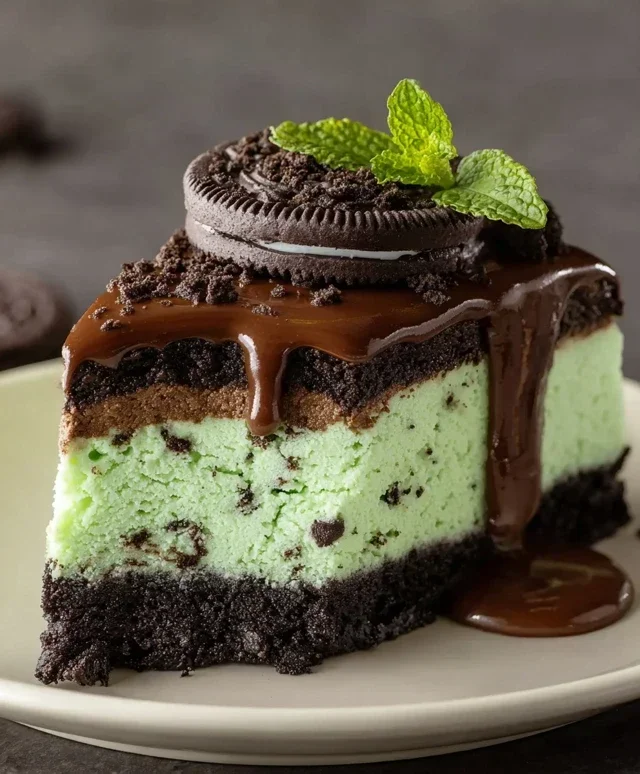
Mint Oreo Cheesecake Delight
Get ready to embark on a decadent dessert journey with my Mint Oreo Cheesecake Delight! This recipe is a showstopper, a creamy, dreamy, minty marvel that’s surprisingly achievable for home bakers. Imagin extracte a rich, smooth cheesecake infused with the unmistakable flavor of mint, all nestled on a crisp, chocolatey Oreo crust and studded with generous chunks of Mint Oreos. And for that extra touch of magic? A drizzle of luscious chocolate ganache. It’s the perfect treat for any occasion, from a special celebration to a simple Tuesday that deserves a little indulgence. I’ve refined this recipe over time to ensure it’s foolproof and utterly delicious. So, gather your ingredients, preheat your oven, and let’s create some dessert magic!
Ingredients:
Crust Preparation:
1. In a medium bowl, combine the 2 cups of Mint Oreo crum extractbs with the 1/4 cup of melted unsalted butter. Stir until the crum extractbs are thoroughly moistened and resemble wet sand. This step is crucial for a crust that holds together well.
2. Press this mixture firmly and evenly into the bottom of a 9-inch springform pan. I like to use the bottom of a flat glass or measuring cup to ensure a compact and uniform layer. Once pressed, place the crust in the freezer for at least 15 minutes while you prepare the filling. This chilling step helps the crust set beautifully and prevents it from becoming soggy when the cheesecake is baked.
Cheesecake Filling Assembly:
1. In a large bowl, using an electric mixer on medium speed, beat the 24 oz of room temperature cream cheese until it is completely smooth and creamy, with no lumps whatsoever. This usually takes about 2-3 minutes. It’s absolutely essential that your cream cheese is at room temperature; this will prevent any grainy texture in your final cheesecake.
2. Gradually add the 1 cup of sugar and 3 tablespoons of all-purpose flour to the cream cheese, mixing until just combined. Don’t overmix at this stage. The flour acts as a stabilizer, helping to prevent cracks in your cheesecake.
3. Beat in the 1 cup of room temperature sour cream, 1 1/2 tablespoons of mint extract, and 2 teaspoons of vanilla extract until just incorporated. The sour cream contributes to the cheesecake’s characteristic creamy and tangy flavor.
4. Add the 4 large eggs, one at a time, mixing on low speed after each addition until just blended. Again, avoid overmixing. Overbeating can incorporate too much air, which can lead to cracking. Scrape down the sides of the bowl as needed to ensure everything is evenly incorporated.
5. Gently fold in the 2 1/4 cups of chopped Mint Oreos. You want to distribute them evenly throughout the batter, creating those delightful pockets of minty cookie goodness. If you’re feeling adventurous and want a more vibrantly green cheesecake, this is the time to add a drop or two of green gel icing color and gently swirl it into the batter. Be careful not to overmix if you add the color, as you want those beautiful swirls.
Baking and Cooling:
1. Pour the cheesecake batter over the chilled crust in the prepared springform pan. Smooth the top with a spatula.
2. To ensure a perfectly smooth and crack-free cheesecake, it’s best to bake it in a water bath. Wrap the outside of your springform pan tightly with a few layers of heavy-duty aluminum foil to prevent any water from seeping in. Place the wrapped pan into a larger baking pan. Carefully pour hot water into the larger pan until it comes about halfway up the sides of the springform pan.
3. Bake in a preheated oven at 325°F (160°C) for about 60-75 minutes, or until the edges of the cheesecake are set and the center is still slightly jiggly. It will continue to set as it cools.
4. Once baked, turn off the oven and leave the cheesecake inside with the oven door slightly ajar for another hour. This gradual cooling process is another key to preventing cracks.
5. After the hour in the oven, carefully remove the cheesecake from the water bath and discard the foil. Let it cool completely on a wire rack at room temperature.
6. Once cooled, cover the cheesecake loosely with plastic wrap and refrigerate for at least 6 hours, or preferably overnight, to allow it to set fully and the flavors to meld.
Chocolate Ganache Drizzle:
1. While the cheesecake is chilling, prepare the ganache. In a heatproof bowl, place the 4 oz of semi-sweet chocolate chips.
2. In a small saucepan, heat the 6 tablespoons of heavy whipping cream over medium heat until it just begin extracts to simmer around the edges. Do not boil.
3. Pour the hot cream over the chocolate chips. Let it sit for 5 minutes without stirring. This allows the heat from the cream to melt the chocolate.
4. After 5 minutes, gently whisk the mixture until it is smooth, glossy, and fully combined, forming a rich ganache. Set aside to cool slightly.
Serving Your Delight:
1. Before serving, carefully run a knife around the edge of the springform pan to loosen the cheesecake. Release the sides of the pan.
2. Just before presenting, warm the 1/2 cup of chocolate sauce slightly if it’s too thick. Then, drizzle it generously over the top of the cheesecake.
3. Whip the 1 cup of cold heavy whipping cream in a separate bowl until stiff peaks form. You can add a tablespoon of powdered sugar if you prefer a sweeter whipped cream.
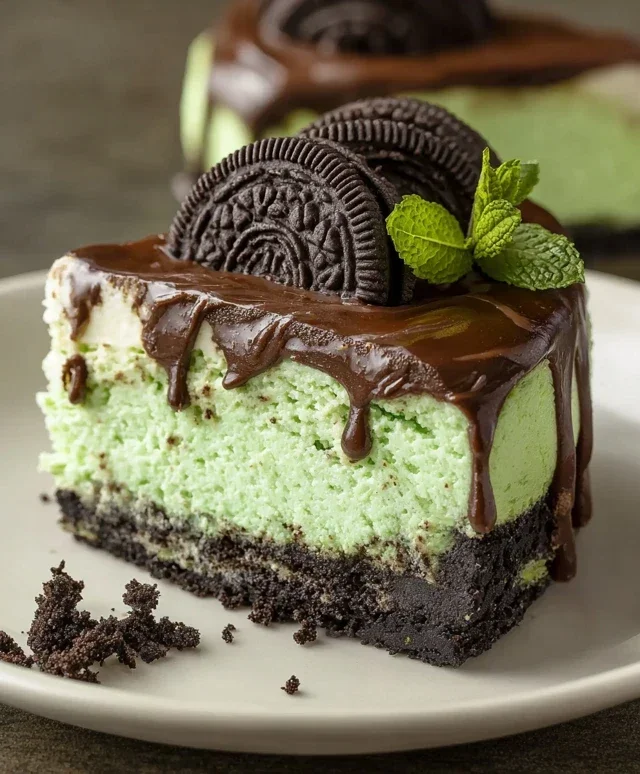
4. Serve slices of your Mint Oreo Cheesecake Delight with a dollop of freshly whipped cream. Each bite is a perfect harmony of mint, chocolate, and creamy cheesecake. Enjoy!
Conclusion:
And there you have it – the ultimate guide to creating your very own Mint Oreo Cheesecake Delight! This recipe truly is a showstopper, combining the rich, creamy indulgence of classic cheesecake with the irresistible crunch and cool minty flavor of Oreos. It’s surprisingly straightforward to make, yet yields a dessert that tastes like it came straight from a high-end bakery. I’m so excited for you to try this delightful treat!
This Mint Oreo Cheesecake Delight is perfect for any occasion, from birthday celebrations and holiday gatherings to simply treating yourself after a long week. For serving, I love drizzling a little extra melted chocolate over the top or adding a dollop of whipped cream and a few extra crushed Oreos. If you’re feeling adventurous, consider adding a touch of peppermint extract to the cream cheese filling for an even more intense mint flavor, or perhaps experimenting with different cookie crum extractbles for a unique twist.
Don’t be intimidated – embrace the process and have fun! The joy of creating something this delicious from scratch is truly rewarding. I can’t wait to hear about your own Mint Oreo Cheesecake Delight creations and see how you put your personal spin on this fantastic dessert. Give it a go, and prepare to be amazed!
Frequently Asked Questions
Can I make this cheesecake ahead of time?
Absolutely! In fact, I highly recommend making this Mint Oreo Cheesecake Delight at least 6-8 hours in advance, or even the day before. Chilling allows the flavors to meld beautifully and the cheesecake to set up perfectly, ensuring a firm yet creamy texture. Just cover it tightly with plastic wrap once it’s cooled completely.
How do I prevent my cheesecake from cracking?
A common cheesecake concern! While a crack won’t affect the taste, it’s nice to have a smooth top. A few tips include not over-mixing the cream cheese, using room temperature ingredients, baking in a water bath (placing the springform pan in a larger pan filled with hot water), and most importantly, allowing the cheesecake to cool gradually in the oven with the door slightly ajar before taking it out. Don’t worry if it cracks a little; the Oreo and mint toppings will cover it beautifully!
Mint Oreo Cheesecake Delight
A decadent mint Oreo cheesecake with a chocolate drizzle, perfect for any celebration.
Ingredients
-
2 cups Mint Oreo crumbs (about 20 Oreos)
-
1/4 cup unsalted butter, melted
-
24 oz cream cheese, room temperature
-
1 cup sugar
-
3 tbsp all-purpose flour
-
1 cup sour cream, room temperature
-
1 1/2 tbsp mint extract
-
2 tsp vanilla extract
-
4 large eggs, room temperature
-
2 1/4 cups chopped Mint Oreos (about 15 Oreos)
-
1/2 cup chocolate sauce
-
Green gel icing color, optional
-
4 oz semi-sweet chocolate chips
-
6 tbsp heavy whipping cream
-
1 cup heavy whipping cream, cold
Instructions
-
Step 1
Preheat oven to 350°F (175°C). Mix Oreo crumbs and melted butter. Press into the bottom of a springform pan. -
Step 2
Beat cream cheese until smooth. Gradually add sugar and flour, beating until well combined. -
Step 3
Stir in sour cream, mint extract, and vanilla extract. Add green gel icing color if desired and mix until uniformly colored. -
Step 4
Beat in eggs one at a time until just combined. Fold in chopped Mint Oreos. -
Step 5
Pour filling over the crust. Bake for 50-60 minutes, or until the center is mostly set but still slightly jiggly. -
Step 6
Turn off the oven, crack the door open, and let the cheesecake cool in the oven for 1 hour. Remove from oven and cool completely on a wire rack. -
Step 7
For the chocolate drizzle: Heat 6 tbsp heavy cream and chocolate chips until melted and smooth. Stir in chocolate sauce. Let cool slightly. -
Step 8
Whip 1 cup cold heavy cream until stiff peaks form. Spread over cooled cheesecake. Drizzle with chocolate sauce mixture.
Important Information
Nutrition Facts (Per Serving)
It is important to consider this information as approximate and not to use it as definitive health advice.
Allergy Information
Please check ingredients for potential allergens and consult a health professional if in doubt.