Easy Mini Lunchbox Pizzas- Kid-Friendly & Quick
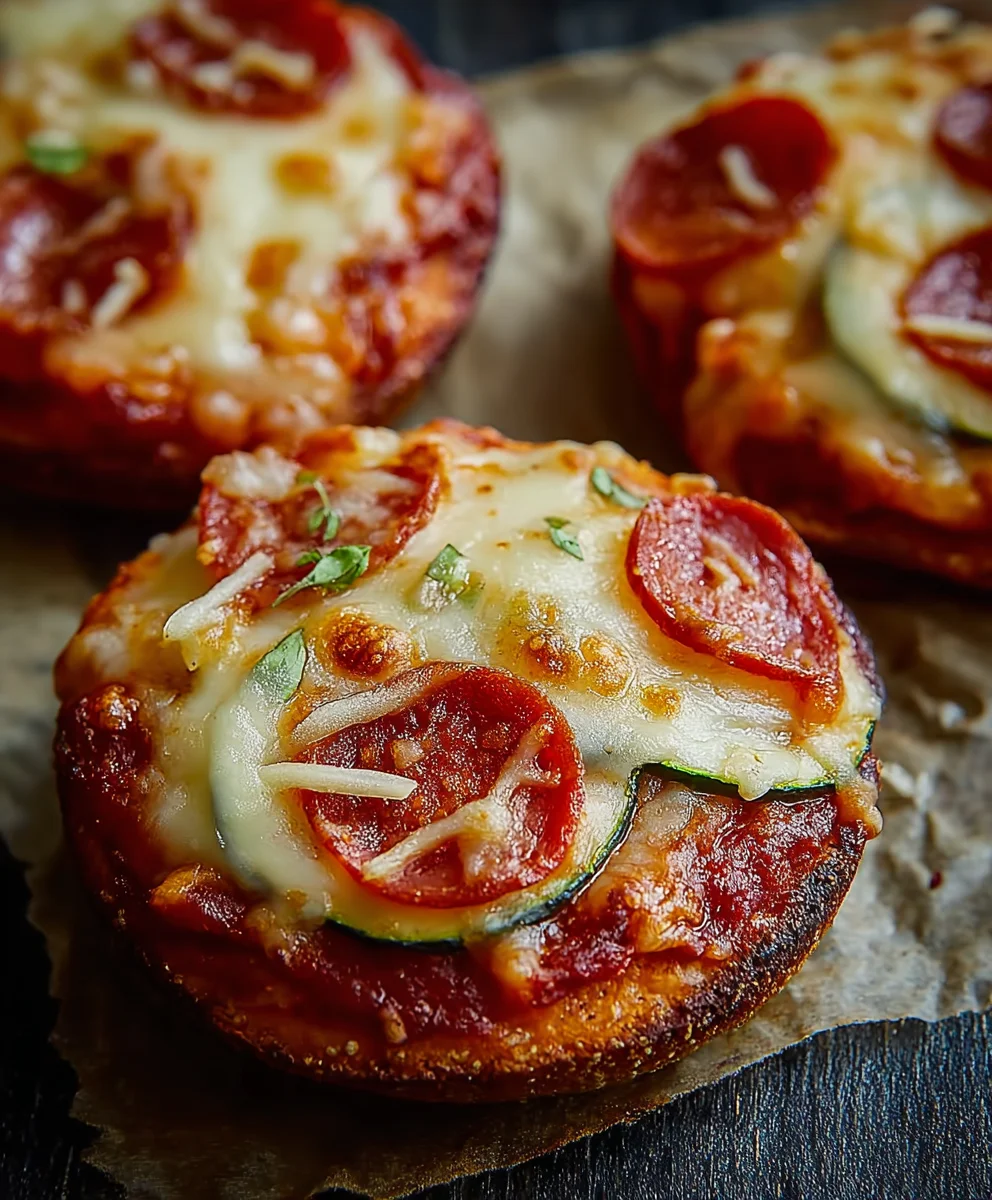
Easy Mini Lunchbox Pizzas are the ultimate solution for busy weeknights and even more so for packed lunches that kids (and adults!) will actually be excited about. Forget sad, squished sandwiches; these delightful little pizzas bring all the cheesy, saucy goodness of your favorite slice into a perfectly portioned, portable package. What’s not to love? They’re incredibly customizable, allowing everyone to top their pizza just the way they like it, and the fun, bite-sized nature makes them irresistible. The magic behind these easy mini lunchbox pizzas lies in their simplicity and the pure joy they bring to mealtime. They’re surprisingly quick to assemble, making them a weeknight lifesaver, and they hold up beautifully in a lunchbox, ensuring a delicious and satisfying midday meal every time. Prepare to become the lunchbox hero you never knew you could be!
Ingredients:
- 2 cups (300g) self-raising flour
- 1 cup (250g) full-fat plain Greek yoghurt
- ⅓ cup (90g) tomato paste (concentrated puree)
- 1 cup (125g) freshly shredded mozzarella
- ½ cup (80g) beef beef pepperoni, thinly sliced
Preparing the Dough
Mixing the Dough
The foundation of our Easy Mini Lunchbox Pizzas is a simple, no-fuss dough that comes together in minutes. In a medium-sized mixing bowl, combine the 2 cups of self-raising flour with 1 cup of full-fat plain Greek yoghurt. The Greek yoghurt is key here; its thickness and acidity react beautifully with the self-raising flour to create a wonderfully soft and slightly chewy dough without any yeast or waiting time.
As soon as you add the yoghurt to the flour, you’ll notice the ingredients begin extract to clump together. Use a sturdy spoon or a spatula to start incorporating them. Don’t worry if it looks a bit shaggy at this stage – that’s perfectly normal. The goal is to just bring everything together into a cohesive mass. Once it’s mostly combined and you can no longer see dry flour, it’s time to get your hands in there.
Kneading and Resting
Lightly flour your work surface – a clean countertop or a large cutting board works perfectly. Tip the shaggy dough out onto the floured surface.gin extractw, begin to gently knead the dough. This isn’t a vigorous, long kneading process like you’d do for bread. You’re just aiming to bring it together smoothly. Fold the dough over itself a few times and press down with the heel of your hand. Continue this for about 2-3 minutes until you have a relatively smooth ball of dough. It should feel soft and slightly sticky, but not so sticky that it’s unmanageable. If it feels too wet, you can add a tiny pinch more flour, but be careful not to add too much, as this can make the pizzas tough.
Once your dough is smooth, place it back into the clean mixing bowl. Cover the bowl with a clean kitchen towel or plastic wrap and let it rest for about 10-15 minutes. This resting period allows the gluten to relax, making the dough easier to roll out and resulting in a more tender pizza base. While the dough is resting, you can preheat your oven and prepare your toppings.
Assembling the Pizzas
Preheating and Shaping
Preheat your oven to 400°F (200°C). Line a baking sheet with parchment paper for easy cleanup. This is also a good time to make sure beef pepperonieroni is thinly sliced, and your mozzarella is freshly shredded, if you haven’t already done so.
Now, take your rested dough out of the bowl and place it back onto your lightly floured work surface. You can divide the dough into smaller portions depending on how many mini pizzas you want to make. For lunchbox-sized portions, I usually divide it into 6-8 equal pieces. Roll each piece into a ball. Then, using a rolling pin or even just your hands, flatten each ball into a small circle, about 4-5 inches in diameter. Aim for a thickness of about ¼ inch. You want them to be sturdy enough to hold the toppings but thin enough to cook through quickly. Don’t worry about them being perfectly round; rustic charm is part of the appeal!
Adding the Sauce and Cheese
Carefully transfer your shaped pizza bases onto the prepared baking sheet. Now, it’s time for the sauce. Take your ⅓ cup of tomato paste and spread a thin, even layer over each pizza base, leaving a small border around the edge for the crust. Because tomato paste is quite concentrated, a little goes a long way, and you don’t want to overdo it, which can make the pizzas soggy. If you prefer a slightly milder tomato flavor, you can mix a tablespoon of water or olive oil into the tomato paste before spreading.
Once the sauce is applied, it’s time for the cheese. Generously sprinkle the 1 cup of freshly shredded mozzarella evenly over the tomato paste. Make sure to get a good coverage, as the melty mozzarella is one of the best parts of any pizza! This is where the magic starts to happen, as the cheese will bubble and brown beautifully in the oven.
Baking and Finishing
ABeef Pepperoni Pepperoni
With the sauce and cheese in place, it’s time to add our beef pepperoni beef pepperoni. Distribute the ½ cup ofbeef pepperoniliced beef pepperoni over the mozzarella. Try to arrange the slices so they are evenly spread across each mini pizza, ensuring that every bite gets a taste of thabeef pepperoni slightly spicy peppebeef pepperonithe pizzas bake, the pepperoni will crisp up around the edges, adding a wonderful texture and flavor.
Baking to Perfection
Place the baking sheet into your preheated oven. Bake for 10-15 minutes, or until the crust is golden brown and puffed, and the cheese is melted and bubbly. Keep a close eye on them during the last few minutes, as ovens can vary. You’re looking for that perfect balance of cooked dough and melted, slightly browned cheese. The aroma that fills your kitchen will be irresistible!
Once they’re done, carefully remove the baking sheet from the oven. Let the Easy Mini Lunchbox Pizzas cool on the baking sheet for a few minutes before transferring them to a wire rack to cool completely. This step is crucial, especially if you’re packing them into lunchboxes, as warm, steamy pizzas can become soggy. Allowing them to cool properly helps maintain their texture. You can serve them warm, at room temperature, or even chilled. They are incredibly versatile and a guaranteed hit!

Conclusion:
And there you have it – your very own batch of delicious and incredibly easy Easy Mini Lunchbox Pizzas! This recipe is a fantastic way to whip up a satisfying and customizable lunch or snack that’s perfect for busy weekdays. The beauty of these mini pizzas lies in their simplicity and versatility. They bake up quickly, resulting in a delightful crispy crust topped with your favorite flavors. Whether you’re packing them for school lunches, office breaks, or even a fun weekend treat, these Easy Mini Lunchbox Pizzas are sure to be a hit with everyone. Don’t be afraid to get creative with your toppings – the possibilities are endless!
For serving suggestions, these Easy Mini Lunchbox Pizzas are wonderful on their own, perhaps with a side of fresh fruit or a small salad for a complete meal. They also make a fantastic appetizer for parties. When it comes to variations, consider using different types of cheese like mozzarella, cheddar, or a blend. You can also experiment with various sauces, from classic marinara to pesto or even a white garlic sauce. Add cooked veggies like bell peppers, onions, or mushrooms, or some protein like mini beef pepperoni or crum extractbled sausage. The key is to have fun and make them your own!
Frequently Asked Questions:
Can I make the Easy Mini Lunchbox Pizzas ahead of time?
Absolutely! You can assemble the Easy Mini Lunchbox Pizzas a day in advance and store them in the refrigerator. When you’re ready to bake, just add a few extra minutes to the cooking time. Alternatively, you can bake them completely and store them in an airtight container. Reheat them in a toaster oven or regular oven for a few minutes until warmed through and the crust is crisp again.
What kind of bread base is best for Easy Mini Lunchbox Pizzas?
For these Easy Mini Lunchbox Pizzas, we’ve found that English muffins, bagels, or even pre-made mini pizza crusts work wonderfully. They provide a sturdy base that bakes up nicely and holds all the toppings without getting soggy. You can also use slices of French bread or even pita bread cut into smaller rounds.
Are Easy Mini Lunchbox Pizzas suitable for freezing?
Yes, the baked Easy Mini Lunchbox Pizzas freeze very well! Allow them to cool completely, then wrap them individually in plastic wrap or foil, and place them in a freezer-safe bag or container. When you’re ready to enjoy, simply reheat them in a toaster oven or oven until heated through and crispy. This makes them an even more convenient option for future lunches!
Easy Mini Lunchbox Pizzas- Kid-Friendly & Quick
Simple, no-fuss mini pizzas made with a quick yogurt-based dough, perfect for lunchboxes and ready in a flash. Kid-friendly and delicious!
Ingredients
-
2 cups (300g) self-raising flour
-
1 cup (250g) full-fat plain Greek yoghurt
-
⅓ cup (90g) tomato paste (concentrated puree)
-
1 cup (125g) freshly shredded mozzarella
-
½ cup (80g) beef pepperoni, thinly sliced
Instructions
-
Step 1
In a medium mixing bowl, combine self-raising flour and full-fat plain Greek yoghurt. Mix with a spoon until a shaggy dough forms. -
Step 2
Turn the dough onto a lightly floured surface and knead gently for 2-3 minutes until smooth and slightly sticky. Place back into the bowl, cover, and let rest for 10-15 minutes. -
Step 3
Preheat oven to 400°F (200°C). Line a baking sheet with parchment paper. Divide the rested dough into 6-8 equal portions, roll each into a ball, and flatten into small circles (about 4-5 inches in diameter and ¼ inch thick). -
Step 4
Transfer the pizza bases to the prepared baking sheet. Spread a thin layer of tomato paste over each base, leaving a small border. Generously sprinkle with shredded mozzarella. -
Step 5
Distribute the thinly sliced beef pepperoni evenly over the mozzarella on each pizza. -
Step 6
Bake for 10-15 minutes, or until the crust is golden brown and puffed, and the cheese is melted and bubbly. Let cool slightly before serving or packing.
Important Information
Nutrition Facts (Per Serving)
It is important to consider this information as approximate and not to use it as definitive health advice.
Allergy Information
Please check ingredients for potential allergens and consult a health professional if in doubt.