Easy Frozen Banana Yogurt Pops – Healthy Treat
Frozen Banana Yogurt Pops are the ultimate treat for anyone seeking a healthier, delightfully creamy, and unbelievably easy dessert or snack. These popsicles are a fantastic way to curb your sweet cravings without the guilt, making them a household favorite for both kids and adults. What’s not to love about a frozen treat that’s naturally sweet, packed with creamy goodness, and requires minimal effort to create? The magic of frozen banana yogurt pops lies in their simplicity and versatility. You can elevate them with a splash of vanilla, a swirl of honey, or even a sprinkle of cinnamon for a flavor explosion. They’re perfect for those hot summer afternoons when you need to cool down, or as a satisfying after-dinner indulgence that feels utterly decadent yet remains incredibly wholesome. Get ready to discover your new go-to frozen delight!
Ingredients:
- 3 bananas, peeled and cut in half
- 3/4 cup vanilla yogurt (or flavor of your choice)
- Colorful sprinkles or toppings of your choice
- 6 popsicle sticks
Preparation and Assembly
Getting Started: The Foundation of Your Pops
The first step in creating these delightful Frozen Banana Yogurt Pops is to prepare your base ingredients. We begin extract with our bananas. Ensure they are fully peeled before you start cutting them. For easier handling and to fit them into popsicle molds or cups, cut each banana in half crosswise. This provides a manageable size for inserting the popsicle stick. If you’re using a more traditional popsicle mold, you might need to cut them into smaller chunks, but for the simple method of using cups or even just inserting sticks directly into the banana half, the halved bananas work perfectly.
Next, let’s talk about the yogurt. The recipe calls for 3/4 cup of vanilla yogurt, but don’t feel limited by this. Vanilla is a classic and creamy choice that complements the banana beautifully. However, if you’re feeling adventurous, you could experiment with strawberry yogurt for a pink hue and added fruitiness, or even a Greek yogurt for a thicker, tangier pop. The key is to have enough yogurt to coat the banana halves thoroughly. Make sure your yogurt is at room temperature or slightly chilled; neither extreme is ideal. Very cold yogurt can be difficult to spread, and excessively warm yogurt might make the banana start to soften too much.
Finally, let’s consider the fun part: the toppings. The recipe mentions colorful sprinkles, which are a fantastic choice for adding visual appeal and a subtle crunch. But the world of toppings is vast and exciting! You could consider finely chopped nuts like almonds or peanuts for added texture and protein. Shredded coconut offers a tropical twist. A drizzle of melted dark chocolate after the pops have set can be absolutely divine. Even a dusting of cinnamon or nutmeg before freezing can add a warm, inviting spice. Think about what flavors and textures you enjoy most and how they would pair with banana and yogurt.
Crafting Your Frozen Banana Yogurt Pops
Step 1: Coating the Bananas
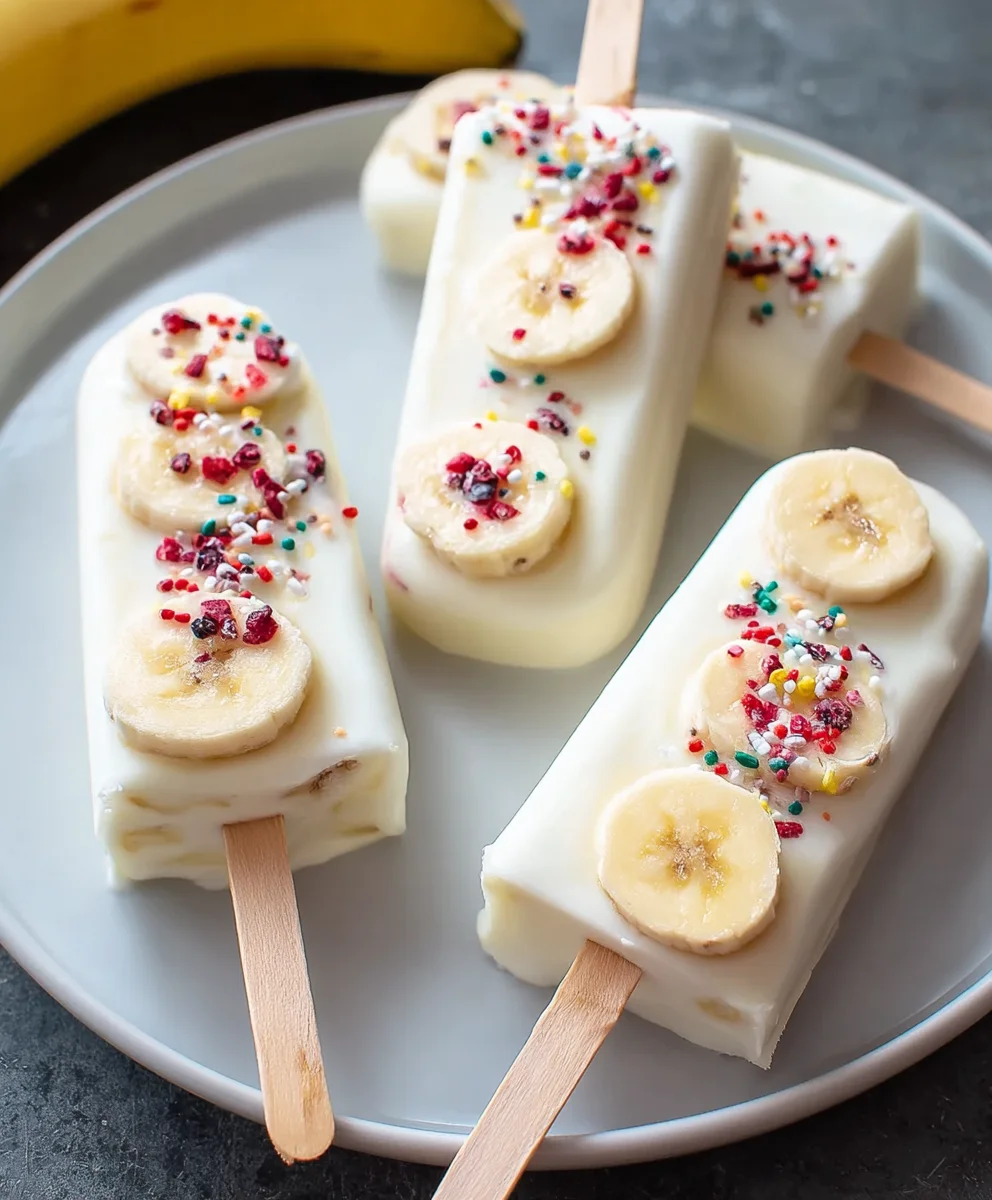
Now it’s time to bring our ingredients together. Take one of your banana halves. Dip it directly into the yogurt, ensuring that you coat all sides as evenly as possible. You can use a spoon to help spread the yogurt if it’s not adhering well, but usually, a good dip is sufficient. Aim for a moderate coating; too thin and the yogurt might not stay on, too thick and it could be overwhelming. Gently shake off any excess yogurt before proceeding to the next step. This initial coating is the delicious creamy layer that makes these pops so special.
Step 2: Adding the Flavor and Fun
Once your banana half is coated in yogurt, it’s time to add your chosen toppings. Immediately after coating, while the yogurt is still wet, roll the banana half in your sprinkles or press on your other desired toppings. This is where you can get really creative! If you’re using sprinkles, a generous coating will ensure that every bite has a festive burst of color and a light crunch. If you’re using something like chopped nuts or coconut, press them firmly into the yogurt so they adhere well. Don’t be afraid to mix and match toppings on different pops for variety. This step is all about making your pops visually appealing and adding exciting textural elements.
Step 3: Inserting the Popsicle Sticks
After you’ve coated and topped your banana halves, it’s time to add the essential popsicle stick. Take a popsicle stick and carefully insert it into the cut end of the banana half. Push it in about halfway, ensuring it’s secure enough to hold the weight of the frozen pop. You want the stick to be firmly embedded in the banana, not just sitting loosely in the yogurt coating. This will act as your handle for enjoying your creation once it’s frozen. If the yogurt starts to slide off as you insert the stick, you might need to gently re-coat that area or ensure your banana is firm.
Step 4: Freezing to Perfection
Once all your banana halves are coated, topped, and have their sticks inserted, it’s time for them to take a chilly bath in the freezer. Arrange your prepared pops on a baking sheet lined with parchment paper or wax paper. This prevents them from sticking to the surface of your freezer shelf. Make sure the banana halves are not touching each other, as they might freeze together. Place the baking sheet into the freezer. Allow them to freeze completely. This typically takes at least 2 to 3 hours, but for the firmest results, you can leave them overnight. Patience here is key to achieving that perfectly frozen treat.
Step 5: The Grand Finnon-alcoholic ale – Enjoying Your Pops!
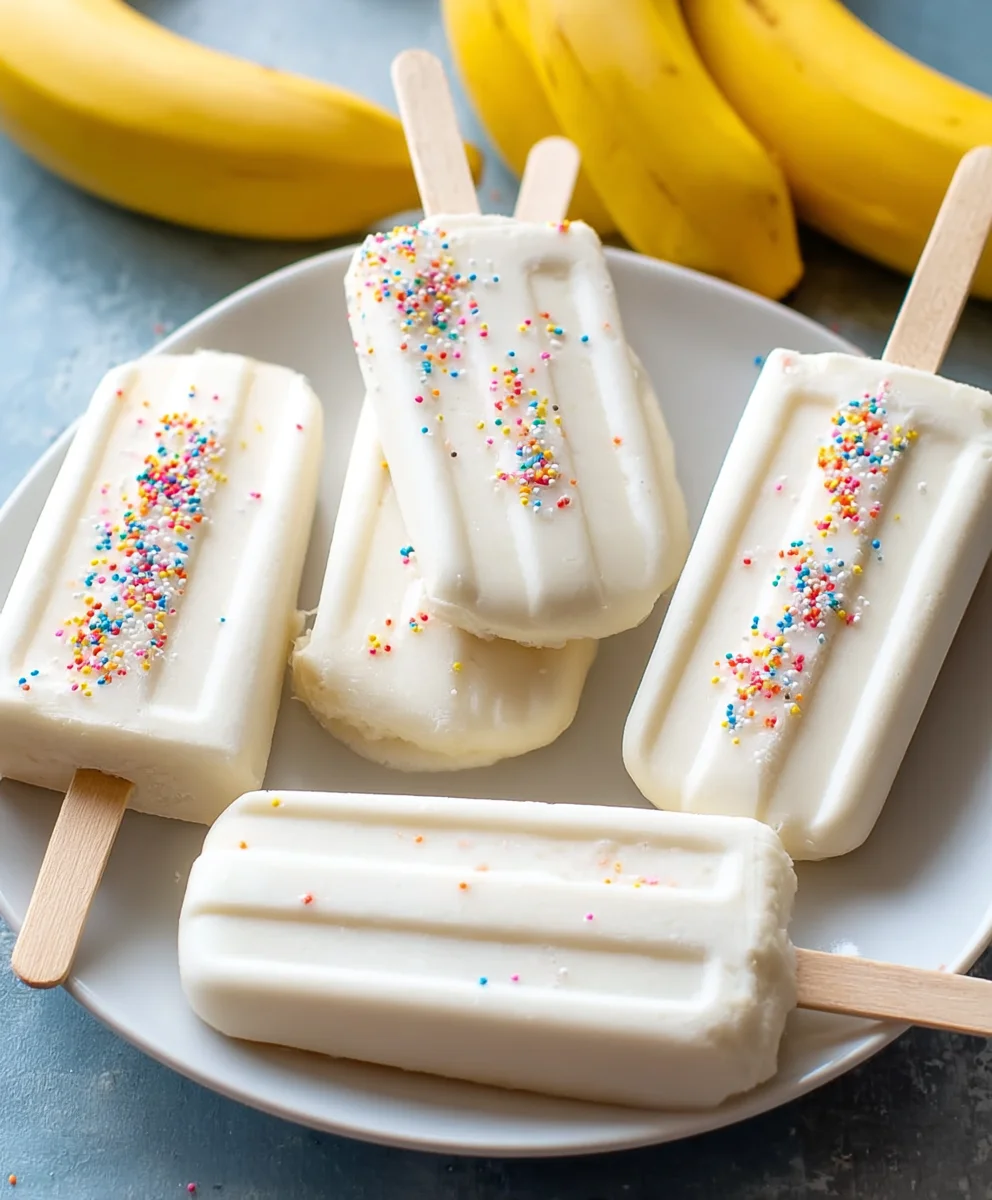
Once your Frozen Banana Yogurt Pops are thoroughly frozen, they are ready to be enjoyed! Carefully remove them from the parchment paper. If they are a little stubborn to release, let them sit at room temperature for just a minute or two, but be mindful not to let them melt too much. Hold them by the popsicle stick and take a big, delicious bite. You’ll experience the creamy yogurt, the sweet, soft banana, and the delightful crunch of your chosen toppings all in one refreshing treat. These pops are best enjoyed immediately after freezing.
Tips for Success and Variations
For an even more decadent treat, consider lightly freezing the yogurt-coated bananas for about 30 minutes before adding the toppings. This can help the toppings adhere even better. If you find your yogurt is too thick to spread easily, you can stir in a tiny splash of milk to thin it out slightly. Conversely, if it’s too thin, a little more yogurt or even a touch of cornstarch (mixed with a little yogurt first to avoid lumps) can help thicken it. Don’t be afraid to experiment with different yogurt flavors and topping combinations. You could even try dipping the finished pops in melted chocolate before freezing for a chocolate-covered banana yogurt pop! Remember that the texture of your banana will affect the final result; slightly less ripe bananas will hold their shape a bit better during the freezing process, while riper bananas will be sweeter and softer. Enjoy your homemade Frozen Banana Yogurt Pops!
Conclusion:
And there you have it – your delicious and incredibly simple Frozen Banana Yogurt Pops! We hope you enjoyed making these refreshing treats as much as we did. This recipe is a fantastic way to use up ripe bananas and create a healthier alternative to store-bought frozen desserts. The creamy yogurt combined with the natural sweetness of bananas makes for a delightful snack or dessert that’s perfect for a warm day. Feel free to get creative with your toppings and flavorings to make them uniquely yours!
For serving suggestions, these pops are wonderful on their own as a quick and satisfying treat. You can also serve them alongside fresh fruit salads or as a fun dessert after a family barbecue. They’re also a hit at kids’ parties!
When it comes to variations, don’t be afraid to experiment! Add a swirl of honey or maple syrup for extra sweetness, or incorporate a pinch of cinnamon or nutmeg for a warm spice note. You can also blend in other fruits like berries or mango for a more complex flavor profile. For a decadent twist, dip them in melted dark chocolate before refreezing.
We truly encourage you to give these Frozen Banana Yogurt Pops a try. They are incredibly forgiving and the results are always rewarding. Happy blending and freezing!
Frequently Asked Questions:
Q1: Can I use regular yogurt instead of Greek yogurt for these Frozen Banana Yogurt Pops?
Absolutely! While Greek yogurt provides a thicker, creamier texture, regular yogurt will work just fine. You might find the pops are slightly less firm, but they will still be delicious. If you use a thinner regular yogurt, you might want to freeze them for a bit longer to ensure they set properly.
Q2: How long can I store Frozen Banana Yogurt Pops?
Properly stored, your Frozen Banana Yogurt Pops can last in the freezer for up to 2-3 weeks. It’s best to keep them in an airtight container or freezer bag to prevent freezer burn and maintain their quality. Make sure they are fully frozen before storing them.
Easy Frozen Banana Yogurt Pops – Healthy Treat
A simple and healthy frozen treat made with bananas, yogurt, and your favorite toppings.
Ingredients
-
3 bananas, peeled and cut in half
-
3/4 cup vanilla yogurt
-
Colorful sprinkles
-
Chopped nuts
-
Shredded coconut
-
Melted dark chocolate (optional)
-
6 popsicle sticks
Instructions
-
Step 1
Peel and cut bananas in half. Ensure yogurt is at room temperature or slightly chilled. -
Step 2
Dip each banana half into the yogurt, coating all sides evenly. Shake off excess yogurt. -
Step 3
Immediately roll the yogurt-coated banana in your chosen toppings (sprinkles, nuts, coconut) while the yogurt is still wet. -
Step 4
Carefully insert a popsicle stick about halfway into the cut end of each banana half, ensuring it’s secure. -
Step 5
Arrange the prepared pops on a parchment-lined baking sheet, ensuring they don’t touch each other. -
Step 6
Freeze for at least 2-3 hours, or until completely firm. Overnight is recommended for best results. -
Step 7
Once frozen, carefully remove from parchment paper and enjoy immediately.
Important Information
Nutrition Facts (Per Serving)
It is important to consider this information as approximate and not to use it as definitive health advice.
Allergy Information
Please check ingredients for potential allergens and consult a health professional if in doubt.