Easy Easter Poke Cake-Springtime Dessert Delight
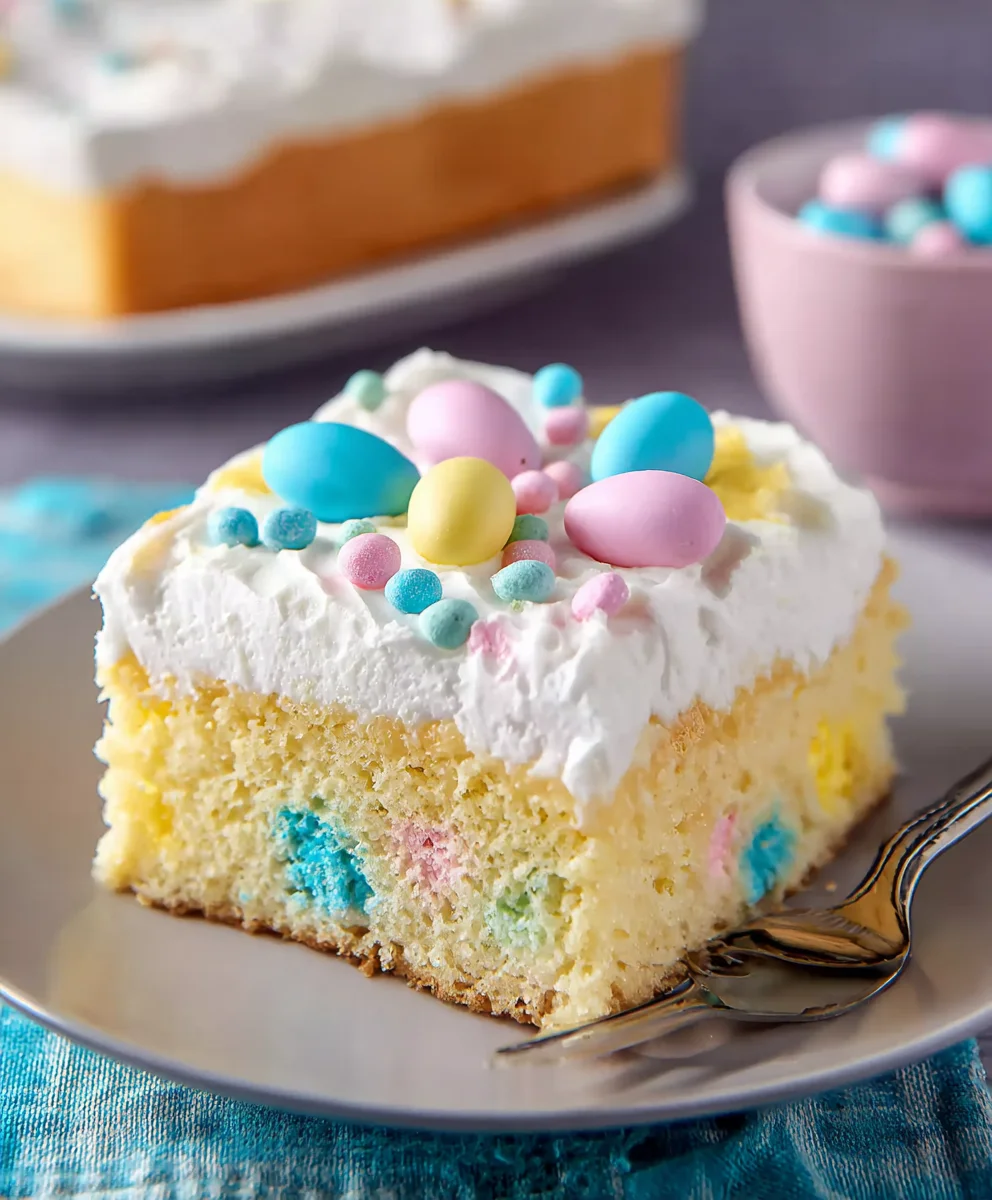
Easter Poke Cake is a truly magical creation that embodies the spirit of springtime celebrations. Imagin extracte a light, fluffy cake, practicgin extracty begging to be infused with vibrant flavors, then transformed into a dazzling dessert that’s as delightful to look at as it is to eat. This isn’t just any cake; it’s a canvas for joyful colors and creamy indulgence. People absolutely adore this dessert because it’s unbelievably simple to make, yet it yields a show-stopping result perfect for any Easter gathering. What makes the Easter Poke Cake so special is the playful interaction between the tender cake and the luscious pudding filling that seeps into every nook and cranny. The result is an unbelievably moist and flavorful experience, crowned with a cloud of whipped topping and festive decorations that capture the very essence of Easter joy.
Ingredients:
- 1 (15.25 ounce) box white cake mix
- 3 large egg whites
- ½ cup vegetable oil
- ½ cup plain Greek yogurt
- ¾ cup whole milk (for the cake batter)
- Pink, yellow, and blue gel food coloring
- 1 (5.1 ounce) package instant vanilla pudding mix
- 2 ¾ cups whole milk (for the pudding mixture)
- 2 cups heavy cream
- 3 Tablespoons granulated sugar
- 1 cup sweetened shredded coconut
- Easter sprinkles and/or mini chocolate eggs for decorating
Baking the Easter Poke Cake Base
Step 1: Prepare the Cake Batter
Begin extract by preheating your oven to the temperature specified on your white cake mix box, usually around 350 degrees Fahrenheit (175 degrees Celsius). Grease and flour a 9×13 inch baking pan, or line it with parchment paper for easy removal. In a large mixing bowl, combine the white cake mix with the 3 egg whites, ½ cup of vegetable oil, ½ cup of plain Greek yogurt, and ¾ cup of whole milk. The Greek yogurt is a fantastic addition here; it adds a delightful moisture and tenderness to the cake, making it even more tender and less likely to dry out. Whisk or beat these ingredients together until they are well combined and you have a smooth, lump-free batter. Be careful not to overmix, as this can develop the gluten too much, resulting in a tougher cake. A minute or two of mixing should be sufficient.
Step 2: Infuse with Spring Colors
This is where the magic starts to happen for our Easter Poke Cake! Divide your prepared cake batter evenly into three smaller bowls. Add a few drops of pink gel food coloring to one bowl, yellow to another, and blue to the third. Gently stir each bowl until the color is evenly distributed. You can adjust the intensity of the color by adding more or fewer drops of food coloring. We’re aiming for vibrant pastel shades that will peek through the cake later. Once colored, carefully spoon dollops of each colored batter into your prepared baking pan, alternating the colors. You don’t need to be precise; a slightly marbled or swirled effect looks beautiful. You can use a toothpick or the back of a spoon to gently swirl the colors together a little more, but again, don’t overdo it.
Step 3: Bake and Poke
Place the pan into your preheated oven and bake according to the cake mix box instructions, usually for about 30-35 minutes, or until a wooden skewer or toothpick inserted into the center of the cake comes out clean. Once baked, let the cake cool in the pan on a wire rack for about 10-15 minutes. While the cake is still warm, and crucially, while it’s still in the pan, use the end of a wooden spoon, a straw, or even the blunt end of a chopstick to poke holes all over the surface of the cake. Make these holes about 1-inch apart, going about halfway down into the cake. This is the “poke” in our Easter Poke Cake! These holes are essential for allowing the pudding mixture to seep into the cake, creating that signature moist and flavorful texture.
Creating the Creamy Pudding Filling
Step 4: Prepare the Vanilla Pudding Mixture
Now it’s time to prepare the luscious filling that will transform our poked cake. In a medium-sized bowl, whisk together the instant vanilla pudding mix with 2 ¾ cups of cold whole milk. Whisk vigorously for about 2 minutes, or until the pugin extractng begins to thicken. Instant pudding is a lifesaver for its speed and ease. Make sure to use cold milk for the best texture; warm milk can prevent the pudding from setting properly. Once thickened, set the pudding aside to allow it to set further while we move on to the next step.
Step 5: Whip the Cream and Combine
In a separate, chilled bowl, whip the 2 cups of heavy cream with the 3 tablespoons of granulated sugar until stiff peaks form. This means that when you lift the whisk, the cream holds its shape and doesn’t flop over. Be careful not to overwhip, as cream can quickly turn into butter. Once the whipped cream is ready, gently fold it into the set vanilla pudding. The goal here is to combine them without deflating the whipped cream too much, maintaining that light and airy texture. This mixture will become the decadent layer that soaks into our poked cake.
Assembling and Decorating Your Easter Poke Cake
Step 6: Filling and Chilling the Cake
Once the cake has cooled slightly and you’ve poked your holes, it’s time to fill it. Spoon the vanilla pudding and whipped cream mixture evenly over the top of the poked cake, spreading it to cover the entire surface. Gently press the mixture down so it seeps into the holes you created. You can use an offset spatula to get a smooth finish. Now, cover the pan tightly with plastic wrap, making sure the plastic wrap doesn’t touch the surface of the filling if possible. Refrigerate the cake for at least 4 hours, or preferably overnight. This chilling time is crucial for the pudding to fully saturate the cake and for the flavors to meld together, making it incredibly moist and delicious.
Step 7: The Coconut Crust and Final Touches
After the cake has chilled sufficiently, it’s time for the final, festive touches. Sprinkle the 1 cup of sweetened shredded coconut evenly over the top of the pudding layer. Press it down gently so it adheres to the cream. This coconut adds a lovely texture and a hint of sweetness that complements the vanilla. Finally, adorn your Easter Poke Cake with an abundance of Easter sprinkles and/or mini chocolate eggs. Get creative with your decorating! You can create patterns, cover the entire top, or simply scatter them for a festive look. This is your chance to make your cake truly special and perfect for any Easter celebration. Slice and serve this delightful, moist, and colorful Easter Poke Cake to all your loved ones.
Conclusion:
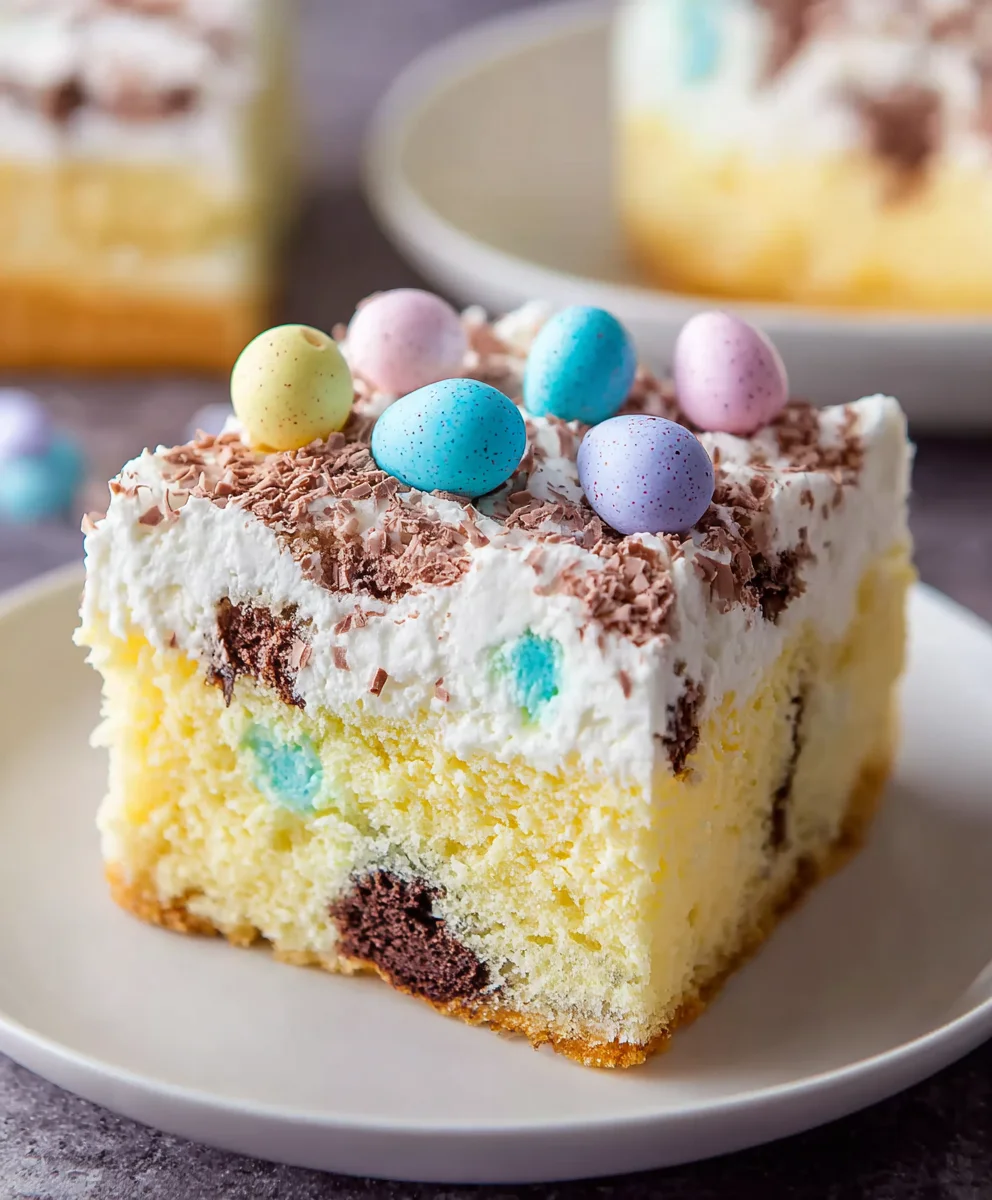
And there you have it – your very own Easter Poke Cake, ready to wow your guests and bring a splash of festive cheer to your celebration! We’ve walked through each step, from moistening the cake with vibrant Jell-O to topping it with a fluffy, decadent whipped cream frosting. This Easter Poke Cake is not just a dessert; it’s a conversation starter and a delightful centerpiece. It pairs wonderfully with a spring-themed salad or a lighter main course. For serving, I love to garnish it with fresh berries or a scattering of pastel-colored sprinkles to enhance its Easter charm.
Don’t be afraid to experiment! You can swap the Jell-O flavors for different color combinations or try a chocolate cake base for a richer profile. Adding mini chocolate eggs or candy-coated chocolates on top makes it even more irresistible. I truly hope you enjoy making and sharing this delightful Easter Poke Cake as much as I do. It’s a simple yet incredibly effective way to make your Easter gathering memorable!
Frequently Asked Questions
Q: Can I make the Easter Poke Cake ahead of time?
A: Yes, absolutely! The Easter Poke Cake is best made at least 4-6 hours in advance, or even the day before, to allow the Jell-O to fully soak into the cake and for the flavors to meld. Cover it tightly with plastic wrap and refrigerate.
Q: What are some other frosting options for the Easter Poke Cake?
A: While the whipped cream frosting is classic and light, you could also use a cream cheese frosting for a tangier flavor, or even a stabilized whipped cream frosting if you need it to hold its shape longer. A simple glaze made with powdered sugar and milk could also work in a pinch.
Easy Easter Poke Cake-Springtime Dessert Delight
A delightful and easy-to-make Easter poke cake featuring a moist, colorful cake base infused with vanilla pudding and whipped cream, topped with coconut and festive decorations.
Ingredients
-
1 (15.25 ounce) box white cake mix
-
3 large egg whites
-
½ cup vegetable oil
-
½ cup plain Greek yogurt
-
¾ cup whole milk
-
Pink, yellow, and blue gel food coloring
-
1 (5.1 ounce) package instant vanilla pudding mix
-
2 ¾ cups whole milk
-
2 cups heavy cream
-
3 Tablespoons granulated sugar
-
1 cup sweetened shredded coconut
-
Easter sprinkles and/or mini chocolate eggs for decorating
Instructions
-
Step 1
Preheat oven to 350°F (175°C). Grease and flour a 9×13 inch baking pan. In a large bowl, combine white cake mix, egg whites, vegetable oil, Greek yogurt, and ¾ cup milk. Mix until smooth, do not overmix. -
Step 2
Divide batter into three bowls. Add pink to one, yellow to another, and blue to the third. Stir until evenly colored. Spoon dollops of each color into the prepared pan, alternating colors. Gently swirl with a toothpick if desired. -
Step 3
Bake for 30-35 minutes, or until a skewer comes out clean. Let cool in the pan for 10-15 minutes. While warm, poke holes all over the cake surface using the end of a wooden spoon or a straw, about 1-inch apart. -
Step 4
In a medium bowl, whisk instant vanilla pudding mix with 2 ¾ cups cold whole milk until thickened, about 2 minutes. Set aside. -
Step 5
In a chilled bowl, whip heavy cream with granulated sugar until stiff peaks form. Gently fold the whipped cream into the set vanilla pudding. -
Step 6
Spoon the pudding and whipped cream mixture evenly over the poked cake, ensuring it seeps into the holes. Cover with plastic wrap and refrigerate for at least 4 hours, or overnight. -
Step 7
Sprinkle sweetened shredded coconut evenly over the top of the chilled cake. Decorate with Easter sprinkles and/or mini chocolate eggs. Slice and serve.
Important Information
Nutrition Facts (Per Serving)
It is important to consider this information as approximate and not to use it as definitive health advice.
Allergy Information
Please check ingredients for potential allergens and consult a health professional if in doubt.